How to Paint Galvanized Metal with Acrylics

How to paint galvanized metal with acrylics means first learning how to prepare galvanized metal for decorative painting.
Maybe it’s just me but I think there’s something irresistible about galvanized metal. A shiny new bucket. An old watering can. A little metal pail or a garden sign. The minute I see one, I start imagining what I could paint on it.
And I just love how it feels to paint on a galvanized steel surface.
But of course, only once it’s been properly prepared.
If you've ever spent hours painting a beautiful design onto galvanized metal, only to have it lift or peel, you already know the frustration.
Acrylic paint doesn't naturally love slick, zinc-coated metal. It just doesn’t.
The good news? With a little (lot) of prep work, galvanized metal becomes a very paintable surface.
The secret is simple:
Clean it. Prepare it. Prime it. Paint it. Protect it. (Your new mantra!)
Let's walk through it.


Why Galvanized Metal Needs Special Preparation

Galvanized steel is coated with zinc to protect the underlying steel from rust and corrosion. That's great for a bucket that's going to live outdoors, but it also means you're starting with a smooth, non-porous surface that isn't particularly interested in holding onto your acrylic paint.
There’s also manufacturing oil, dirt, fingerprints or other residue on the surface to deal with. In other words, don't just grab your brush and start painting.
Preparing Galvanized Metal for Painting
What You'll Need:
- Grease-cutting dish soap (Dawn) or household degreaser (Krud Kutter)
- A scrub pad or sponge
- White vinegar, if you choose to use it
- 220-grit sandpaper or a fine sanding sponge
- Clean, lint-free rags
- Waterborne bonding primer suitable for galvanized metal (see recommendations below)
- Foam brush or small roller if using a brush-on primer
- A hair dryer
And one thing you absolutely don't need... Steel wool.
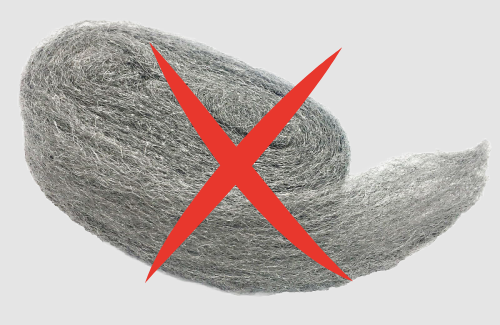
While steel wool is handy for plenty of painting and refinishing jobs, I don't recommend using it on galvanized metal.
Tiny bits of invisible steel break off and remain on the surface. Those particles will rust and show up as little orange flecks throughout your painted surface in weeks or months down the road. I speak from experience. Ugh!
Step 1: Give It a Really Good Cleaning
Start with very hot water and a grease-cutting dish soap.
Wash the entire piece thoroughly, paying particular attention to handles, seams, rims and anywhere your hands have been gripping the metal. Rinse well.
If water beads up on the surface, it still has grease or residue on it. Give it another cleaning. Then once you've rinsed the piece, dry it thoroughly with a clean, lint-free cloth.
For containers with seams, rolled edges or tucked-in rims, I like to use a hair dryer to chase the moisture out of those hard-to-reach areas. Those little areas love to hold onto water.
You want the surface completely dry before moving on.
Step 2: A Little Vinegar Treatment (optional)
This is an optional extra preparation step, particularly useful when you're working with new galvanized metal. I swear by it.
Dampen a clean rag with white vinegar and wipe down the whole surface. The mild acidity helps prepare and dull the zinc surface. You don't need to drown the piece in vinegar. A good, thorough wipe is all that's required. Allow it to sit briefly, then wipe the surface clean with a damp cloth and let it dry completely.
Step 3: Give the Surface Some Tooth
Using 220-grit sandpaper or a fine sanding sponge, lightly scuff the entire surface. This gives your primer something to grab onto.
You're not trying to remove the galvanized coating. You're simply dulling that slick surface and creating a little "tooth" for the primer. No need to be aggressive. Light and even is the goal.
Once you're finished scuffing, remove the sanding residue with a clean, damp cloth and allow the piece to dry again.
Step 4: Prime It Properly
Galvanized metal needs a primer specifically designed to adhere to difficult surfaces such as zinc-coated metal. And because we're decorative painters, there's one more requirement:
The primer needs to provide a suitable foundation for your acrylic paint.
Here are the products I recommend for my students. By the way, I prefer the spray-on vs brush-on.
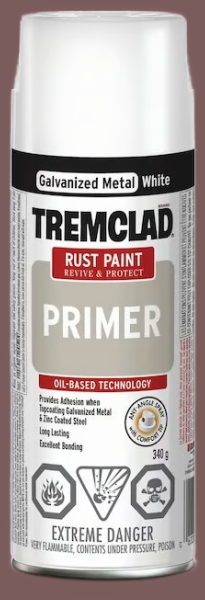
For My Canadian Painters
Choose TREMCLAD® Water-Based Rust Primer. This is a water-based primer formulated for adhesion to surfaces including galvanized metal. The manufacturer states that it can be top-coated with either water-based or oil-based finishes.
That makes it a good foundation for the acrylic paints we use for decorative painting.
Look for it at retailers such as Canadian Tire, RONA and other stores that carry TREMCLAD products. Availability can vary, so if you're shopping online, search for the exact product name.
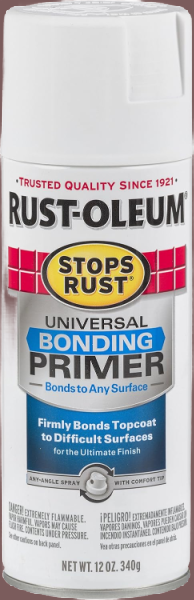
For My U.S. Painters
Choose Rust-Oleum® Stops Rust® Universal Bonding Primer. This primer is designed for difficult-to-paint surfaces, including galvanized steel, and provides a bonding surface for your topcoat.
Look for it at retailers such as Lowe's and The Home Depot. Availability can vary by location.
Applying the Primer
Follow the manufacturer's directions for application, drying and curing time.
If you're using a spray primer, work in a well-ventilated area and apply light, even coats rather than trying to cover everything in one heavy coat.
If you're using a brush-on primer, a foam brush or small foam roller can help you achieve a smooth foundation for decorative painting.
And here's an important note:
Dry and cured are not necessarily the same thing.
Allow the primer to cure according to the manufacturer's instructions before you start painting. I know you're anxious to get at those brushes, but this isn't the place to rush.
Now We Can Do Some Decorative Painting
on Galvanized
Steel
Once the primer has properly cured, you've got a much friendlier surface for your acrylic paints. And you can pull out your favourite decorative painting colors and get to work.
Floating, dry brushing, blending, stencilling, lettering, stroke work... whatever your project calls for.
And because you've done the boring part first, you can spend your time worrying about the fun stuff instead. Like whether that bucket really needs another flower. Of course it does!
If Your Project Will Be Displayed Outdoors
Here’s how to weatherproof acrylic paint on galvanized steel.
Even a properly prepared and painted surface is going to be exposed to moisture, temperature changes and sunlight. Once your painting is completely dry, protect it with an exterior-rated clear finish that is appropriate for the surface and the conditions where your project will live.
For my US Painters: Rust-Oleum Stops Rust Crystal Clear Enamel or Rust-Oleum Universal Clear. (Look for the words "Non-Yellowing" or "Crystal Clear" explicitly on the can).
For my Canadian Painters: Varathane Ultimate Water-Based Polyurethane Outdoor Spray. It’s specifically engineered with UV blockers to remain 100% transparent and completely resist yellowing over time
And remember, no sealer can turn a decorative painting into an indestructible object. If your painted piece is going to spend its life sitting outside in full sun or sub-zero temps, it's going to have a tougher time than something living on a covered porch.
A Myth-Busting Farewell
One final word of advice for protecting your masterpiece.
Don't automatically recoat it every year.
It can be tempting to think that adding another layer of clear finish must mean adding another layer of protection. But exterior finishes don't necessarily work that way.
Applying a new product over an older finish that has weathered outdoors can cause problems such as cloudiness, poor adhesion or an uneven, textured surface, particularly when the products aren't compatible.
Instead, take a "Look, Don't Spray" approach.
Give your project a gentle cleaning with warm, soapy water when needed and take a good look at the finish. If the painting is still in good condition, leave it alone.
If you find a small chip or damaged area, clean it, let it dry thoroughly and touch up the damaged spot rather than automatically spraying another coat over the entire piece.
And if the clear finish has genuinely started to deteriorate, follow the manufacturer's instructions for cleaning, recoating or refinishing that particular product. Don't assume that a new coat of sealer is always the answer.
That's the beauty of doing the preparation properly in the first place. A well-prepared surface, properly primed, painted and finished with a product appropriate for outdoor use gives your decorative painting the best chance of standing up to the elements.
OK, we’re done here… That was fun!
So go find that dull little galvanized object you've been ignoring. You know the one. It has potential. Grab your brushes and give it a second life.
Let's go back to the HOME page.

Cheryl Poulin, CPC, has been helping decorative painters of all levels grow their acrylic painting skills since 1993. She has taught thousands of students, published 50+ instructional packets and videos, and helped revive interest in the decorative art form with a beginner painting program using her step-by-step Earmark Studio Method.
Cheryl’s work has appeared in publications such as: The Decorative Painter, PaintWorks, and Tole World. Cheryl provides your-decorative-painting-resource.com as a free resource. She’s happiest when she sees her students succeed. Cheryl relaxes with a brush in hand, painting, doodling, and creating.
Grow Your Painting Skills With Me
You Can Paint These Trees and More

Get Your Video Course Now
Introductory Price
Save 30% plus
a Money Back Guarantee



You Can Paint These Trees and More
Get Your Video Course Now
Introductory Price
Save 30% plus
a Money Back Guarantee
Recent Articles


-
Painting Galvanized Metal with Acrylics: Complete Prep Guide
Sep 28, 26 11:02 AM
 Stop your acrylic paint from peeling off galvanized steel! Learn the 5-step prep routine decorative painters use to make art stick permanently.
 -
Learn sponge painting techniques to create textured backgrounds.s.
Sep 07, 26 03:21 PM
 Discover positive and negative sponge painting techniques. Use different kinds of sponges for mottling, marbling, and learn easy fixes when you make a mistake.
 -
CBP0047 - Sunflower Folly Pattern Packet
Aug 30, 26 02:02 PM
 Increase your painting skills. Enjoy learning the wet dry brush technique in my CBP0047 - Sunflower Folly pattern packet.
 -
A decorative painting pattern guide helps you choose what to buy.
Aug 30, 26 09:13 AM
 Use Cheryl Poulin’s ultimate decorative painting pattern guide to discover how pattern packets work for beginners vs. advanced painters! Choose wisely.
 -
Learn how to use a liner brush for swirls and smooth curlicues.
Aug 22, 26 02:52 PM
 Ever painted a curlicue that suddenly turned into a skinny worm with a kinked body? I'll show you how to use a liner brush for swirls you'll be proud of.
 -
Ugly stage of a painting, it happens. Don't shelve your project yet.
Jul 19, 26 08:10 AM
 It's a frustrating thing but it's to be expected. The ugly stage of a painting simply means you're about halfway through your project. Take heart and keep going!
 -
is decorative painting still popular
Jul 06, 26 10:32 AM
 Hobbyists are asking, is decorative painting still popular? Yes but it has changed quite a bit.





Site Search
| site search by freefind | advanced |


You Can Paint These Trees and More
Get Your Video Course Now
Introductory Price
Save 30% plus
a Money Back Guarantee