- Home
- Chalk Paint
Chalky Paint
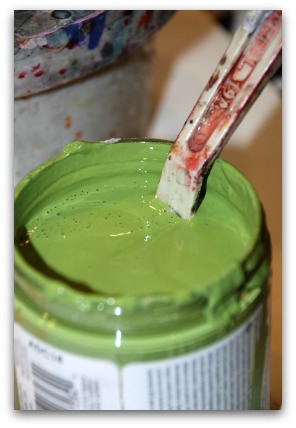
There are many brands of chalk or chalky paint on the market. So far I've had some fun using Americana® DECOR™ Chalky Finish paint.
The paints are very thick and need to be stirred before using them. There isn't much work involved in getting the surface of your project ready. No priming or sanding needed for most objects.
Introducing... Earmark Creative Studio

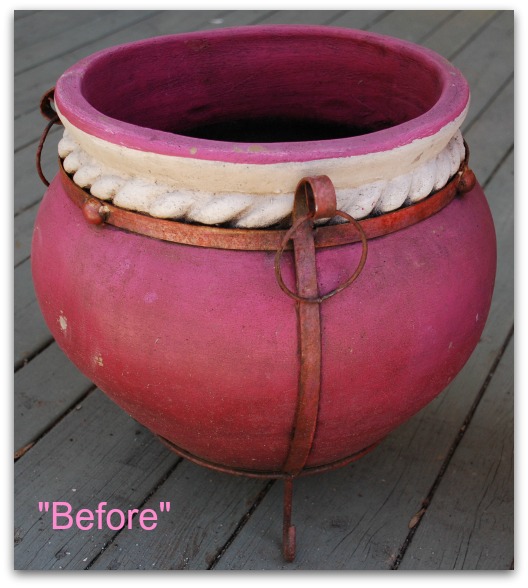
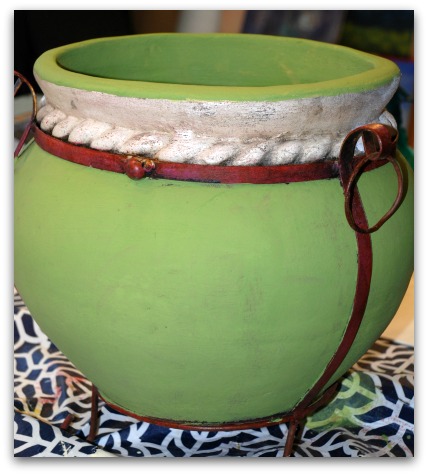
Featured here is my selected project. A lovely flower pot given to me many years ago. Originally a vibrant red, it has faded to an undesirable dark pink. I don't "do" pink. Not that there's anything wrong with it but I'm kind of earthy and tom boyish.
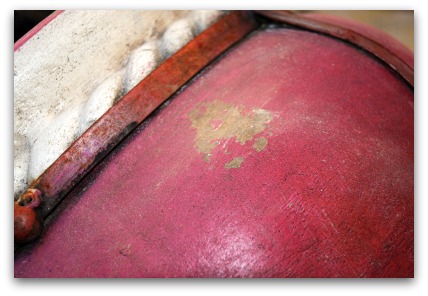
Even though I didn't need to, I did go ahead and sand the flower pot. There was loose flaking paint. I also washed the dirt off it with warm soapy water and then rinsed it. The interior I left untouched.
As I washed the pot I noticed that the red pigment was coming off. So I elected to use a Multi Surface Sealer to prevent the original paint from leaching through. The Chalky Paint label says: "Natural tannins or existing stain finishes may bleed through any paint: test on hidden area to ensure stain blocker not required."
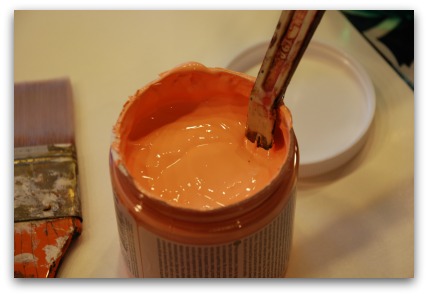
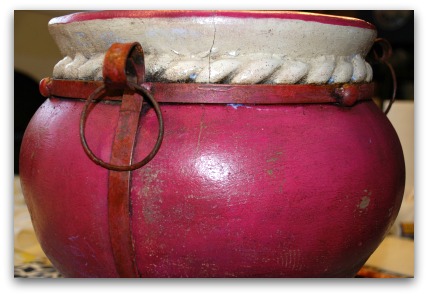
I thought I would make the pot a little brighter with a color called "Smitten". The name alone captivated me. However, as the paint dried it took on a very baby-ish peachy/pink color.
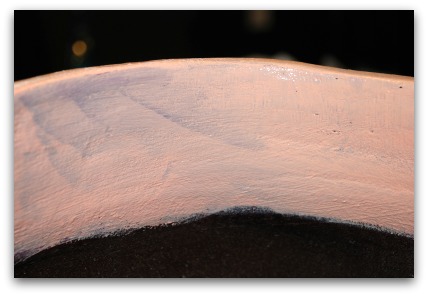
Not at all what I expected. Yikes!! This would not do!
I had a pile of colors to choose from but for some reason I couldn't find the one color I KNEW would be the one. Maybe I imagined I had the color or maybe in my messy studio it just disappeared.
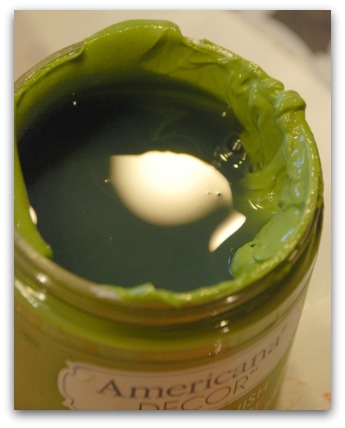
When I first opened the jar of "New Life" the pigments had separated. I was really concerned. But I did a lot of stirring to get the paint completely smooth and incorporated and all was well.
I love greens, I really do.
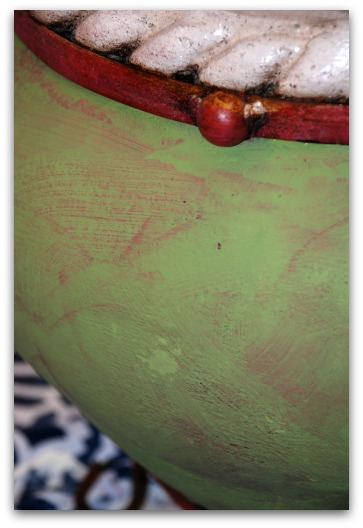
I did a first coat and I began to listen to the Little Voice in my head.
LV: "You know, that's not going to look right."
ME: "Shut up. Since when do you give up so easily."
LV: "You know I'm right. You're wasting time."
ME: "It's only the first coat."
LV: "Whatever!"
OMG! The Little Voice was right! The pot looks like something out of a Dr. Seuss book!!!!
So I tore the studio apart until I found what I was looking for. At long last!
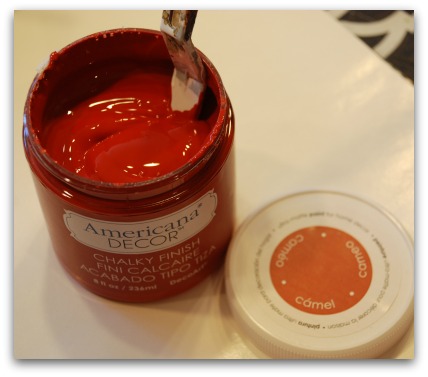
This is "Cameo". A beautiful warm brick red. Now that's more like it.
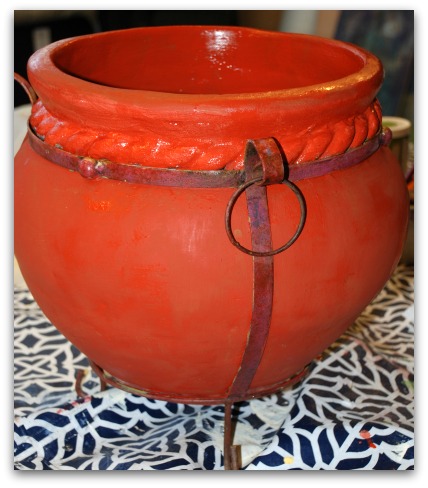
This is it after the first coat. I was feeling a whole lot better.
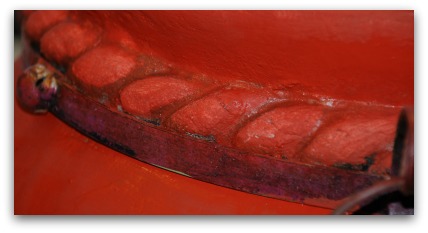
After the second coat had dried, I dry-brushed some Dark Chocolate into the grooves of the braid details.
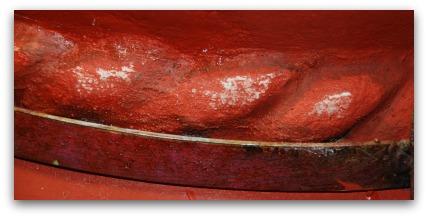
Then I sanded off the tops of the braid details, revealing the original white paint.
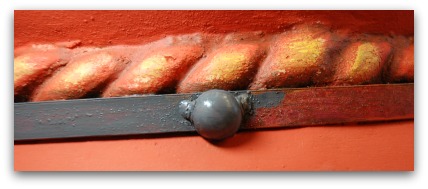
Then I applied a wash of Primary Yellow to tone down the sanded areas.
I painted the metal bands with "Relic", a beautiful dark grey.
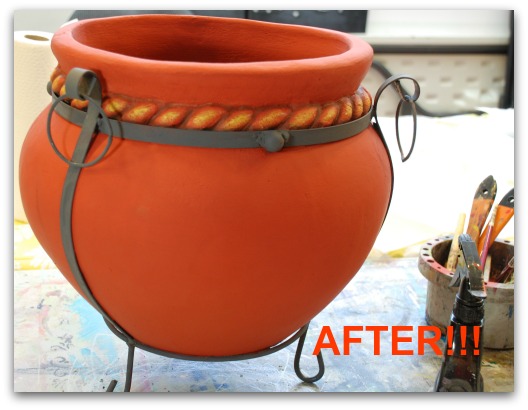
So here it is. A complete make over using chalky paint!!! And it suits my environment and home decor much better now.
Because this is an object that will be used outdoors, I'll be using Americana Decor® Varnish in a matte finish because I love this look.
But before I do.... do you think I need to add anything else to it? Leave me a comment below!
For your shopping convenience here are the products I use for doing chalky painting on a variety of surfaces.
These are links to Amazon. When you buy products from my site I do earn a teensy weensy commission which does not affect you at all. The commissions allow me to keep this web site alive. Please do not feel obligated to purchase anything. Support your local stores.
You Can Paint These Trees and More

Get Your Video Course Now
Introductory Price
Save 30% plus
a Money Back Guarantee


You Can Paint These Trees and More
Get Your Video Course Now
Introductory Price
Save 30% plus
a Money Back Guarantee
Recent Articles
-
Earmark decorative painting studio in Ottawa! A cozy place to paint.
May 02, 26 03:28 PM
 Earmark decorative painting studio is a very comfortable and relaxing studio and classroom catering to all painting levels.Located in rural, scenic Ottawa.
 -
CBP0012 Funky Winter Chicken
Apr 14, 26 03:18 PM
 You'll get your funky dance on with my Funky Winter Chicken e-Pattern Packet. Detailed step-by-step instructions, line drawings, pictures and materials ensure your success with this project.
 -
CBP0045 Stained Glass Coasters Pattern Packet
Apr 14, 26 03:16 PM
 This faux Stained Glass Coasters Pattern Packet will provide you with hours of fun creating and using these coasters.
 -
CBP0005-Daisies at Dusk
Apr 14, 26 03:06 PM
 We all love daisies and you will love painting Daisies at Dusk. This decorative painting e-packet also known as a tole painting e-pattern has detailed step-by-step instructions, lots of pictures, mate…
 -
CBP0004-Get-Crackin
Apr 14, 26 03:03 PM
 Here's Get-Crackin, an advanced, trompe loeil pattern packet. You will love the results you get. Detailed step-by-step instructions and lots of pictures.
 -
CBP0002-hey-tiger
Apr 14, 26 02:57 PM
 CBP0002-hey-tiger is a beautiful Eastern Tiger Swallowtail butterfly
 -
CBP0028-High Realism Poppy Pattern Packet
Apr 14, 26 02:49 PM
 Enjoy CBP0028-High Realism Poppy Packet. This project is guaranteed to please. Settle into a quiet place, add layers and watch this poppy come alive.


Site Search
| site search by freefind | advanced |


You Can Paint These Trees and More
Get Your Video Course Now
Introductory Price
Save 30% plus
a Money Back Guarantee