- Home
- Varnishing
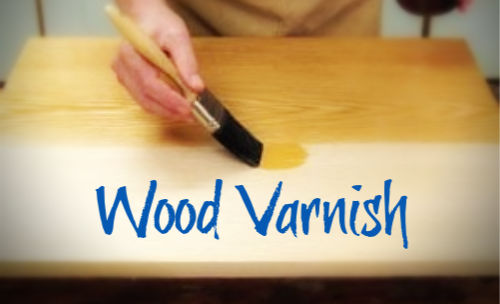
Wood Varnish
Many people have difficulty using wood varnish. How about you?
Many acrylic painters put off varnishing their projects for fear of ruining their hard work. But varnishing is a must if you want to protect the surface you worked so hard to create.
In this article, I discuss applying varnish to surfaces painted with acrylics. However, I provide tips and techniques for applying wood varnish to any surface. So, read on…
Introducing... Earmark Creative Studio

Why Do I Need to Varnish My Work?
As acrylic paint dries, it forms microscopic honeycomb structures. Then, as the moisture evaporates, those honeycombs get tighter and tighter and bond together.
Even though they are tightly bonded together, tiny spaces remain between them where dirt, grease and grime can collect over time. In effect, the dirt doesn't just settle on the surface, it gets into the paint!
As the ambient temperatures naturally cool and warm, the acrylic paint expands and contracts. This ensures the dirt will get trapped in those microscopic spaces.
Varnishing goes a long way in filling those microscopic spaces and protecting your hard work. With a coat of wood varnish protecting your surface, you can safely clean your painted projects.
PLUS, varnishing will bring out the color of your painting and make it come alive!
How Do I Use Wood Varnish?
The easiest method for varnishing is usually a spray-on application. I must confess that it's my favorite. However, spraying is not always practical, so learning to apply varnish with a brush is very important.
Stir… Do Not Shake Bottled Varnish
Varnishes come in different sheens. Gloss is how varnish comes out when it's manufactured. To make varnish have a satin or matte finish, matting agents are added to the varnish. For this reason, it's imperative that you carefully prepare the varnish before you use it.
When you use a spray-on varnish it’s important to shake the can. BUT when it comes to varnishes from a bottle or can you must NOT shake them. You need to stir them thoroughly without creating bubbles.
Bubbles or air pockets in your varnish with create unwanted texture. Even worse, it will also create a hazy finish when it dries.
Be Patient
You cannot hurry this part. Well, you can… but you really shouldn’t.
Stir the varnish really well. If you don't, the matting agents will not be distributed evenly, and this will cause grey or white hazy streaks over your painted surface.
Ask me how I know! This haze cannot be fixed and will ruin your hard work.
I like to roll the bottle or can of wood varnish on its side for about 5 minutes and then finish up by stirring carefully for another couple of minutes.
Don't work from the bottle or can. It's way too easy to contaminate the varnish. Instead, pour the varnish onto a Styrofoam plate or other container.
Applying the Wood Varnish
Use a dry, soft bristled brush appropriately sized for the project at hand. I will usually use a flat brush that's at least 1 inch and sometimes, up to 2 inches wide.
You will be applying more than one coat of varnish. So, if the first coat isn't perfect, don't sweat it.
And please don't try to "fix" your first application by going over it again while it's wet. And definitely do not go over it again when it’s tacky. Just let the first coat dry as is. The next coat will even things out. Trust me!
Here’s something that’s important to know. Today's varnishes are self-leveling. So, don't sweat the brush marks. They'll pool out naturally... by that I mean the brush marks will disappear into a smooth finish.
Too Little or Too Much
Apply a generous amount of varnish to the surface in long, even strokes. Always overlap a little as you work your way across the surface.
If you use too little varnish, you'll get dry spots where the brush will feel like it's dragging. Remember, the varnish will self level so it’s better to use more rather than too little.
So, if you see dry streaks in your application, quickly re-load the brush and pick up where you left off.
NOTE: If you're right-handed, work from left to right. And if you're left-handed, work from right to left.
Storing the Brush Between Coats
While the first coat is drying, carefully wrap the brush in plastic food wrap and place it in the refrigerator. If you only have the one brush, then wrapping it and storing in the fridge will keep it in perfect condition for subsequent coats.
Better still, if you have 2 brushes, wash the first one thoroughly and set it aside to dry completely. Then use a fresh brush for the second coat.
Sanding Between Coats
When the first coat of varnish has completely dried, give it a very light sanding. Use a very fine sandpaper,like 220-grit. Don't use steel wool because the varnishes I'm recommending are water-based and could create tiny rust spots on your project. We don't want that!
Use a tack cloth or damp paper towel to remove the sanding dust.
Apply a second coat of varnish.
For furniture and other high use items, you will need more coats of varnish. Sand between each coat. Do not sand the final coat.
My Personal Favorite Brands
People often ask me what my favorite varnish is. I've had consistently great success with the products listed below. But, if you prefer, I'd encourage you to try other brands and see how they perform for you.
Brush-On Varnishes
- Minwax™ Polycrylic™ Protective Finish
- Minwax™ Water-Based Helmsman™ Spar Urethane for exterior use
- Americana DuraClear™ Varnishes, can be used for indoor or outdoor projects
- Chroma's Jo Sonja™ Water Based Polyurethane Varnish
- Liquitex Professional Varnish
Spray-On Varnish
- Minwax™ Fast-Drying Polyurethane Aerosol
- Liquitex Professional Spray
You can find varnishes in most hardware or home improvement stores as well as art supplies/craft supplies stores. They're also available on Amazon.
For your convenience I've provided links to some products on Amazon below.
If you purchase through Amazon, I get a teensy-weensy commission which doesn't affect your cost. It does however keep my kitties fed and supplied with catnip.
Best Tip Ever
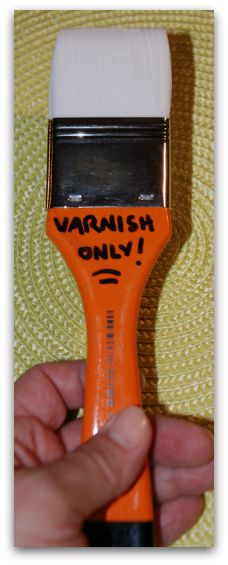
My final tip is this... be sure to dedicate your varnishing brush JUST FOR VARNISHING! Don't use it for any other purpose. You're welcome!
Amazon Links
As promised, here are the Amazon Links to Wood Varnishes and Brushes for your convenience:
Minwax™ Polycrylic™
Protective Finish
Minwax™ Water-Based Helmsman™ Spar Urethane
Americana DuraClear
Chroma's Jo Sonja
Varnish Brush - 2-inch
Minwax™ Fast-Drying Polyurethane Aerosol
You Can Paint These Trees and More

Get Your Video Course Now
Introductory Price
Save 30% plus
a Money Back Guarantee


You Can Paint These Trees and More
Get Your Video Course Now
Introductory Price
Save 30% plus
a Money Back Guarantee
Recent Articles
-
Earmark decorative painting studio in Ottawa! A cozy place to paint.
May 02, 26 03:28 PM
 Earmark decorative painting studio is a very comfortable and relaxing studio and classroom catering to all painting levels.Located in rural, scenic Ottawa.
 -
CBP0012 Funky Winter Chicken
Apr 14, 26 03:18 PM
 You'll get your funky dance on with my Funky Winter Chicken e-Pattern Packet. Detailed step-by-step instructions, line drawings, pictures and materials ensure your success with this project.
 -
CBP0045 Stained Glass Coasters Pattern Packet
Apr 14, 26 03:16 PM
 This faux Stained Glass Coasters Pattern Packet will provide you with hours of fun creating and using these coasters.
 -
CBP0005-Daisies at Dusk
Apr 14, 26 03:06 PM
 We all love daisies and you will love painting Daisies at Dusk. This decorative painting e-packet also known as a tole painting e-pattern has detailed step-by-step instructions, lots of pictures, mate…
 -
CBP0004-Get-Crackin
Apr 14, 26 03:03 PM
 Here's Get-Crackin, an advanced, trompe loeil pattern packet. You will love the results you get. Detailed step-by-step instructions and lots of pictures.
 -
CBP0002-hey-tiger
Apr 14, 26 02:57 PM
 CBP0002-hey-tiger is a beautiful Eastern Tiger Swallowtail butterfly
 -
CBP0028-High Realism Poppy Pattern Packet
Apr 14, 26 02:49 PM
 Enjoy CBP0028-High Realism Poppy Packet. This project is guaranteed to please. Settle into a quiet place, add layers and watch this poppy come alive.


Site Search
| site search by freefind | advanced |


You Can Paint These Trees and More
Get Your Video Course Now
Introductory Price
Save 30% plus
a Money Back Guarantee