- Home
- Wearable Art
Wearable Art
I love creating wearable art. You know, hand painted silk scarves, painted shoes, brooches and pins, hand felted garments... I love all that stuff.
For my first tutorial I'll be showing you my process for making pins from recycled canvas.
Yes indeed, I save my painted disasters and turn them into mini works of wearable art.
I simply remove all the staples from the wooden support frame. I keep the frame so I can stretch my own canvases later to save money. Then I make a pile from my discarded attempts. Yes, I said pile.
Introducing... Earmark Creative Studio

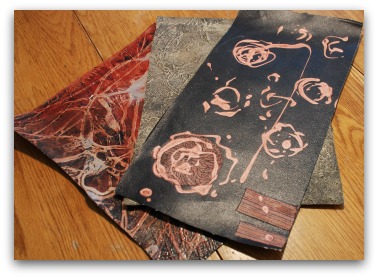
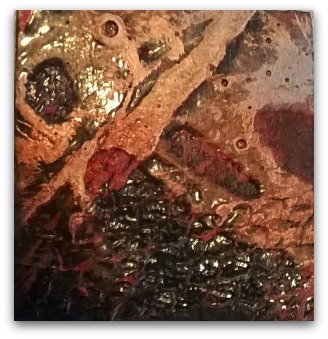
Here I've selected three very textured canvases.
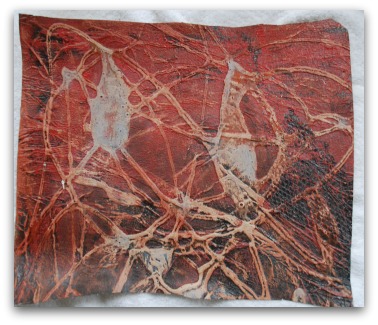
From this canvas I'm going to cut 2 of the same shape. Two circles and an even number of rectangles, maybe two squares.
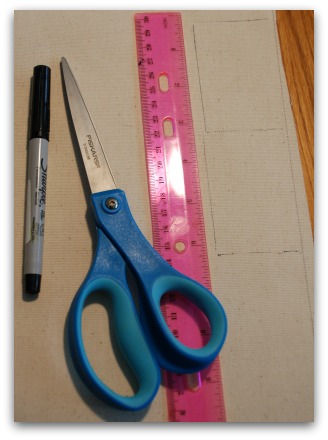
On the back of the canvas I draw the shapes using a ruler. For circles I use a large bottle cap or a small drinking glass. Don't make the pins too large. Rectangles are about 2" x 3", square 2" x 2" and circle 2-1/4" in diameter.
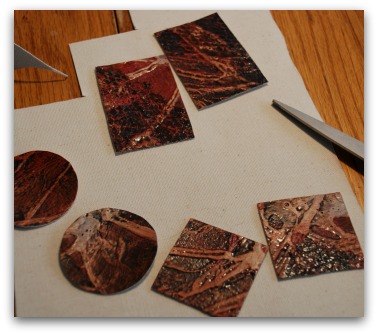
Cut with sharp scissors. If the canvas has a lot of texture it will be difficult to cut with less than very sharp scissors.
Don't throw out the scraps yet. You may need them to embellish your pins.

My favorite adhesive is Golden Heavy Gel for doing work that needs to not come apart. The bond is very strong yet flexible.
Another great adhesive is E-6000. That would work here as well.
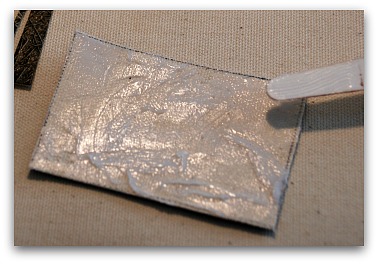
Using the back of a palette knife or a wooden craft stick, smear some gel on the back of one of your shapes, making sure to spread it out to the very edges. While wet, lay the matching shape on top, matching the edges as much as possible.
If it's not a perfect match don't fret. Once dry we just trim with the scissors. If your shapes are not perfectly straight that just adds to the charm.
If gel oozes out when you squish them together, wipe the excess with a damp paper towel.
Place your pins between two sheets of wax paper and cover with a heavy object. Let set up for about an hour. When dry, trim where needed. If you don't like the ragged edges, sand them down with 220-grit sandpaper or use a nail file.
Paint the edges a dark color. My pins are dark reds and deep mauves, so I used Soft Black.
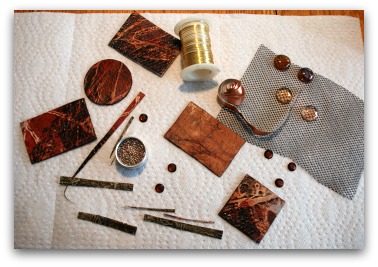
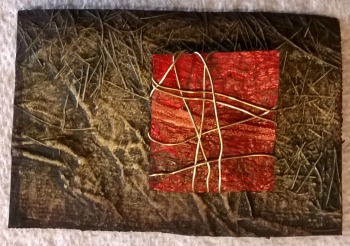
Gather up some stuff you have kicking around. Here I have small mesh bags in black and one in white that once held pearl onions. I have fine gold metal wire on a spool. There are large glass beads. There's a roll of self-adhesive copper foil tape, love that stuff! There are faux copper rhinestones and seed beads and some of the scraps I didn't throw out.
If I use the scraps, I paint the edges as well. I don't want to see a white edge.

For this pin I first applied the self adhesive copper foil tape. I used a small metal embossing tool to press it down and leave texture marks.
Using some of my scraps, I added two organic looking strips onto the foil with the gel medium.
I used a #16 Flat to float a wide shade of Soft Black on both sides of the copper foil.
On the left side of the tape I applied a some gel and laid down a piece of the white mesh. At first the gel remains foggy but it will dry clear in a few hours.
And finally I added a glass bead with the gel medium. Note that the gel is still foggy. This too will dry clear.
Next pin....
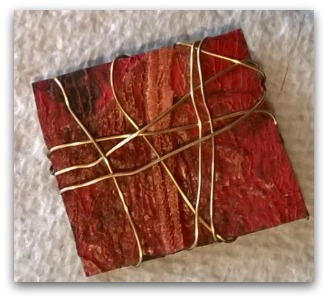
Here I cut out a small 3/4-inch square and wrapped it with the gold wire. I wanted to add an embellishment to one of my rectangles.
I added the square with a generous amount of gel medium on the back. Pressed it down and removed the excess gel with a damp cloth and left it to dry.
However I did have a similar pin I started a while back and I felt it needed more.
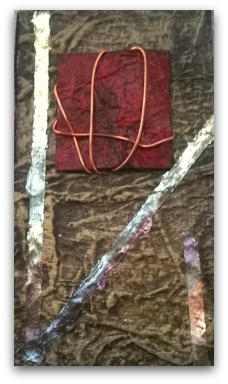
So I added Black variegated gold leaf using Designa 1/8" tack tape. It comes in many widths and it's SO easy to use!
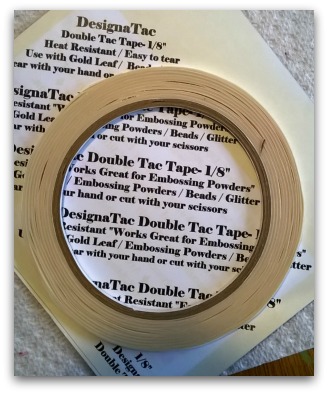 Designa Tac Tape
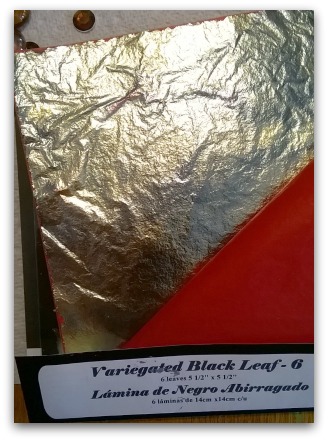
The picture doesn't do this justice. The gold leaf is swirling in black and blues. So beautiful!
Sometimes I don't need to embellish at all because I like the way it looks the way it is. As is the case with this little beauty! So then all I do is add the pin back with the gel medium.
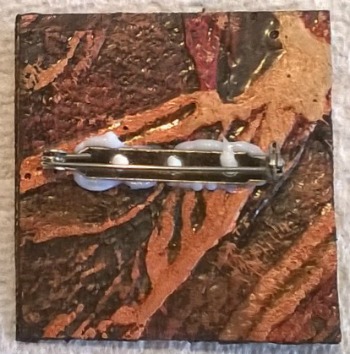
Apply a generous amount of the gel onto the pin back finding. Press down firmly. The excess will keep the pin back finding in place securely and it will dry clear.
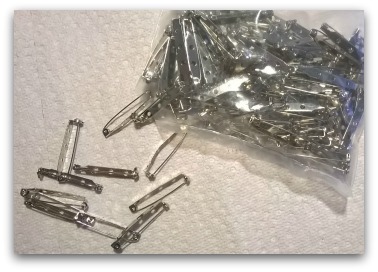
You can get pin back findings in most craft stores and online.
I hope you enjoyed this short tutorial and that you'll try it yourself. People love receiving them as gifts and they're also hot sellers at art and craft shows.
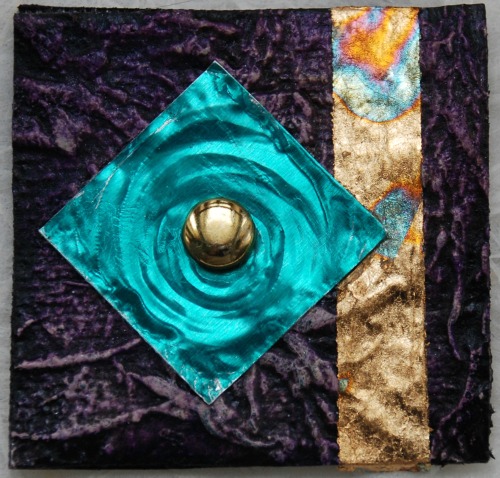
By the way, the pin at the top of the page was embellished with a square of aqua metal foil, some blue variegated gold leaf and a brass brad (I snipped off the back fasteners). People LOVE that one.
For your convenience, if you need any of these products feel free to check out the links below. No obligations to buy anything,of course. Most items are available from your local craft or art stores. If you do use these links to Amazon I do earn a teensy commission but it doesn't cost you anything. My little commissions over time add up and it allows me to feed my cats! :o)
Let's go from this wearable art page back to the Home page.
You Can Paint These Trees and More

Get Your Video Course Now
Introductory Price
Save 30% plus
a Money Back Guarantee


You Can Paint These Trees and More
Get Your Video Course Now
Introductory Price
Save 30% plus
a Money Back Guarantee
Recent Articles
-
Earmark decorative painting studio in Ottawa! A cozy place to paint.
May 02, 26 03:28 PM
 Earmark decorative painting studio is a very comfortable and relaxing studio and classroom catering to all painting levels.Located in rural, scenic Ottawa.
 -
CBP0012 Funky Winter Chicken
Apr 14, 26 03:18 PM
 You'll get your funky dance on with my Funky Winter Chicken e-Pattern Packet. Detailed step-by-step instructions, line drawings, pictures and materials ensure your success with this project.
 -
CBP0045 Stained Glass Coasters Pattern Packet
Apr 14, 26 03:16 PM
 This faux Stained Glass Coasters Pattern Packet will provide you with hours of fun creating and using these coasters.
 -
CBP0005-Daisies at Dusk
Apr 14, 26 03:06 PM
 We all love daisies and you will love painting Daisies at Dusk. This decorative painting e-packet also known as a tole painting e-pattern has detailed step-by-step instructions, lots of pictures, mate…
 -
CBP0004-Get-Crackin
Apr 14, 26 03:03 PM
 Here's Get-Crackin, an advanced, trompe loeil pattern packet. You will love the results you get. Detailed step-by-step instructions and lots of pictures.
 -
CBP0002-hey-tiger
Apr 14, 26 02:57 PM
 CBP0002-hey-tiger is a beautiful Eastern Tiger Swallowtail butterfly
 -
CBP0028-High Realism Poppy Pattern Packet
Apr 14, 26 02:49 PM
 Enjoy CBP0028-High Realism Poppy Packet. This project is guaranteed to please. Settle into a quiet place, add layers and watch this poppy come alive.


Site Search
| site search by freefind | advanced |


You Can Paint These Trees and More
Get Your Video Course Now
Introductory Price
Save 30% plus
a Money Back Guarantee