How To Use
A Liner Brush for Swirls
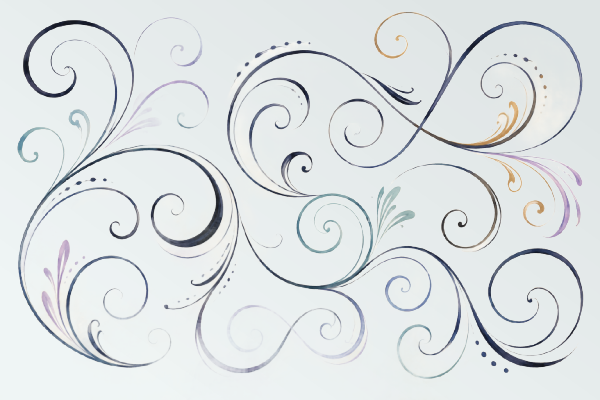
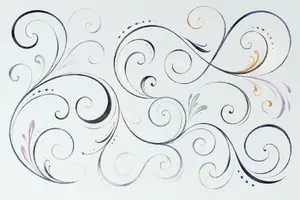
Let's look at how to use a liner brush for swirls and pretty curlicues.
When you look at them, curlicues and long swirls look so easy. You pick up a liner brush, make a little swirl, and there it is. Nothing could be simpler. Right?
Well... sometimes. But not usually.
If you've ever painted a curlicue that started out beautifully and then it suddenly turned into a skinny little worm with a kinked body and a blunt end, you're not alone. Swirling lines are tricky.
But once you understand what the brush is supposed to do, they become much easier to master.


Now let's talk about which brush to use
and how to load it
correctly.
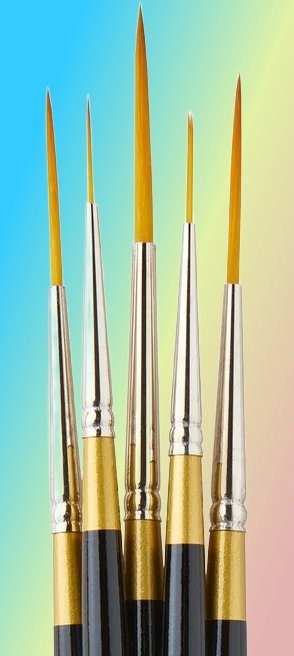
The best brush to use is a long liner, better known as a Script Liner or a Rigger.
Be forewarned, my friend! Using a script liner brush requires precise fluid control because its long, flexible bristles hold a lot of paint and bend very easily.
Here's a little tip if you're just starting out. You can practice with a #1 mid-length liner. It will give you some confidence and then you can move up to the script liner later. Baby steps as always.
Listed below are the techniques you'll want to master to feel confident and in control of your brush.
Paint Preparation
- Thin your acrylic paint with water to an inky, fluid consistency.
- Mix it until it flows like whole milk.
- Thick paint will clog the long bristles instantly.
- Gently tap the sides of the brush tip on your palette to form a sharp point. Don't twirl the hairs.
Hand and Body Posture
- Hold the handle further back than a normal pen.
- Keep the brush almost completely vertical to the surface.
- Anchor your pinky finger to your surface for stability.
- Pull the strokes toward your body whenever possible.
- Move your entire arm rather than just your wrist.
Stroke Techniques
- Touch only the very tip to create very thin curlicues.
- Press down a little to create elegant, tapering thick lines.
- Lift gradually as you finish a swirl.
- Maintain a slow, steady speed to prevent shaking.
- Breathe.
- Reload your brush before it starts splitting or dragging.
Here are a few practice exercises
Before trying the following exercises, I want to point out that I haven't supplied you with a traceable worksheet. And that’s actually part of the exercise.
It’s important to practice your linework freehand. It'll get you into the flow and help you become familiar with how your brush performs. And give you a feel for the best way to hold your brush so you’re comfortable and your hand doesn’t tire or cramp up.
If you try to follow a pattern too closely, it won’t work very well. The reason is that it’s a bit like trying to forge someone’s signature. You’ll naturally become slow and precise, and that’s exactly what a liner brush doesn’t respond to very well.
When you see a design featuring swirls and scrolls, use them simply as guides for placement. Don’t try to copy them exactly. You’ll drive yourself bananas!
OK, Time To Practice!
Grab a piece of paper. Thin some paint and load your liner.
Now practice these five things:
1. Vertical Straight lines
Start with light pressure, increase the pressure, then release it and lift.
2. Small Commas
Start with the point of the brush, pressing slightly, pull while releasing the pressure and lift.
3. Curlicues
Start with light pressure and let the brush gradually widen as you move through the curve. Then release the pressure as you finish.
4. Swirls and Loops
Do some loose figure 8s.
5. Spirals
Make circles that spiral inward. Then make circles that spiral out from the center.
To learn how to use a liner brush for swirls, remember to keep that brush upright
and stay on the tip as you practice.
Do several of these exercises in a row. Don't stop after the first one and decide you're terrible at scrolly lines.
Those first attempts are allowed to be ugly. Believe me, if I don't do scrolls and curlicues for a while, I have to practice a bit before I commit.
One more thing... Don't slow the brush down too much.
This is a big one. When we're nervous about making a mistake, we tend to creep along with the brush. And a liner brush does not particularly enjoy being crept along.
A smooth, steady movement gives you a much prettier line. So load your brush, hold it upright, take a breath, relax your hand and commit to the stroke. Breathe into it!
You don't need to be fearless. You just need to keep moving.
And if your curlicue isn't perfect? Paint another one. That's how you get better.
Before long you'll find yourself adding curlicues without giving them much thought at all. They'll become part of your brush vocabulary, just like floats, strokes and dots.
And that's when the fun really begins!
Let's go back to the HOME page.

Cheryl Poulin, CPC, has been helping decorative painters of all levels grow their acrylic painting skills since 1993. She has taught thousands of students, published 50+ instructional packets and videos, and helped revive interest in the decorative art form with a beginner painting program using her step-by-step Earmark Studio Method.
Cheryl’s work has appeared in publications such as: The Decorative Painter, PaintWorks, and Tole World. Cheryl provides your-decorative-painting-resource.com as a free resource. She’s happiest when she sees her students succeed. Cheryl relaxes with a brush in hand, painting, doodling, and creating.
Grow Your Painting Skills With Me
You Can Paint These Trees and More

Get Your Video Course Now
Introductory Price
Save 30% plus
a Money Back Guarantee



You Can Paint These Trees and More
Get Your Video Course Now
Introductory Price
Save 30% plus
a Money Back Guarantee
Recent Articles


-
CBP0048 - The Promise of Autumn Pattern Packet
Sep 28, 26 04:04 PM
 Enjoy this quick and fun project featuring background creation with alcohol
 -
How to Paint Galvanized Metal with Acrylics: Complete Prep Guide
Sep 28, 26 01:25 PM
 Stop acrylic paint peeling off galvanized steel! 5-step prep routine decorative painters use to make art stick and how to paint galvanized metal with acrylics.
 -
Learn sponge painting techniques to create textured backgrounds.s.
Sep 07, 26 03:21 PM
 Discover positive and negative sponge painting techniques. Use different kinds of sponges for mottling, marbling, and learn easy fixes when you make a mistake.
 -
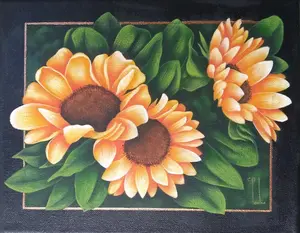
CBP0047 - Sunflower Folly Pattern Packet
Aug 30, 26 02:02 PM
 Increase your painting skills. Enjoy learning the wet dry brush technique in my CBP0047 - Sunflower Folly pattern packet.
 -
A decorative painting pattern guide helps you choose what to buy.
Aug 30, 26 09:13 AM
 Use Cheryl Poulin’s ultimate decorative painting pattern guide to discover how pattern packets work for beginners vs. advanced painters! Choose wisely.
 -
Learn how to use a liner brush for swirls and smooth curlicues.
Aug 22, 26 02:52 PM
 Ever painted a curlicue that suddenly turned into a skinny worm with a kinked body? I'll show you how to use a liner brush for swirls you'll be proud of.
 -
Ugly stage of a painting, it happens. Don't shelve your project yet.
Jul 19, 26 08:10 AM
It's a frustrating thing but it's to be expected. The ugly stage of a painting simply means you're about halfway through your project. Take heart and keep going!


Site Search
| site search by freefind | advanced |


You Can Paint These Trees and More
Get Your Video Course Now
Introductory Price
Save 30% plus
a Money Back Guarantee