Hand Painted Wine Glasses
and More!

I do love hand painted wine glasses and I also love to take plain white dishes and make them into something precious. I hope you like this design featuring a Christmas rose on a metallic gold band. Enjoy this step-by-step tutorial, I really had fun bringing it to you.
If you're brand new at painting on glass then scroll down to the next project. It will get you familiar with the paints. Once you've done that project it will boost your confidence to try the Christmas rose.
This design can be adapted to fit on any surface, so be creative! I shop for glasses, plates, platters, jars etc., at dollar stores. Keeps costs down. Gotta love that!
To purchase painting supplies that you don't have on hand there is a list further down with convenient links to Amazon.
Gather your supplies...
To complete this project you will need the following:
Large wine glasses
White ceramic plates
White ceramic mugs would look great too!
Rubbing alcohol
Paper towel
Medical exam gloves (to keep oils from your hands off the glass)
Disposable foam plate
Sharp craft cutting knife
1/4-inch green painter's tape
Hair dryer
Tailor's measuring tape
Tracing paper
Black graphite paper
Stylus
Paint Brushes
Choose soft synthetic brushes in the following shapes and sizes...
#1 mid-length Liner
#6 Filbert
#8 Flat (Shader)
1-inch Sponge brush or cosmetic sponge wedge
!/4-inch Deerfoot
Here's where you can see what those brushes look like
Paints
Americana® Gloss Enamels®
Glorious Gold
Black
Milk Chocolate
Natural Buff
White
Avocado
Bright Yellow
Dark Chocolate
Tuscan Red
Line Drawing
Click here to download the line drawing for these hand painted wine glasses.
And here we go...

First wash your hands to remove any oils and of course skip the hand moisturizer. :o)
Moisten paper towel and wipe down the wine glasses very thoroughly.

Using a tailor's measuring tape and an extra fine felt tip marker, measure down from the rim about 1-3/4 to 2-inches. Go all the way around the outside of the glass.

Use the painter's tape, positioning it slightly above the measuring marks you've made.
I use 1/4-inch tape on round objects because it's narrow enough that it won't easily crease.

Without overlapping, add three more rows of tape below the first one.

Carefully remove tape rows #2 and #3. The space between the tape is where you're going to apply the gold band.

Pour a dollop of Glorious Gold on your foam plate. Using the sponge, pick up the paint and simply dab it carefully between the tape lines. Go all the way around.
The paint will be bubbly and textured. This is a good thing.
Now, use the hairdryer to dry the first layer. LET IT COOL COMPLETELY. I'm not yelling but I just want to make sure you read that bit of information. If you paint the next coat while the glass is warm you will lift the paint. Ask me how I know!
So when the glass is completely cool again, sponge on another coat. Dry and allow to cool. Clean your sponge.
Your next step is to use your sharp cutting knife to score the paint where it meets the tape. If you don't score the paint the tape lift off the paint as you pull. That would ruin your hand painted wine glasses! So take the time.

After you've scored the paint, pull the tape away from the painted area.

This is how it should look at this point.
Let's keep going with these hand painted wine glasses!

Trace the line drawing onto the tracing paper. Cut the tracing to a manageable size and tape it to your glass. Avoid putting the tape on the paint. It's still not cured so it's very delicate.
Slide the black graphite paper between the tracing and the glass. Use the stylus or empty ballpoint pen to transfer the design to the glass.

Here you can see the faint outline of the rose and the leaves.
Where the gold paint goes through the flower and part of the leaf, you will have to remove the paint. Do this now rather than wait. It's easier to do when the paint is still fresh.
Carefully score the outline of the parts that need to come out then carefully scrape off or lift the paint off with your blade. If you don't remove the paint it will leave unsightly ridges in your finished painting. You want your hand painted wine glasses to look amazing, right?

This is what it should look like once you've removed the paint.

Using the Filbert, basecoat the petals with Natural Buff. Yes, you will see brush marks. I did 4 coats, speed drying in between each coat, letting the glass cool completely before moving on to subsequent coats.

Use Black and the Liner to outline each petal. Try to keep the lines as thin as possible. Paint on the petal edges rather than on the clear glass. That way you'll only need one coat.

Load half of the #8 Flat with a mix of Natural Buff and a touch of Milk Chocolate. Shade at the base of each petal using a soft pitty pat motion.

Next, use the Filbert to basecoat the leaves with a mix of Avocado and a touch of Black. You will need 4 coats.
Using the Liner, outline the leaves with Black and add the center veins.
Use the Deerfoot to stipple in the flower center. First use Milk Chocolate. Dry. Cool.
Add a bit of Black in with the Milk Chocolate and stipple the lower half of the flower center. Wipe the brush and pick up some Bright Yellow to brighten the top part of the flower center. Dry. Cool.
Now use the liner and some White to add a few dots in the very center.

Use the drawing as a guide to add a few pine branches. Use the Liner and Milk Chocolate to establish the branch. Then add needles with a dark green mix. When dry and cool add a layer of Avocado. Then do a layer with Bright Yellow.

Here it is on the ceramic plate. After the pine branches are done, you can add small comma stroke highlights on top of the leaves with a mix of Bright Yellow and a bit of Avocado and tiny touch of White.

Here you can see the small comma stroke highlights better.
Now, using the top of the handle of your Liner, pick up Tuscan Red and add berries. Dry and cool.
Then use the pointy tip of the liner to add tiny shine dots on the berries.
You can then use the Dark Chocolate to shade the band behind the flower. Use the #8 Flat half loaded into the paint.
NOTE: Clean your brushes thoroughly between each coat of paint with rubbing alcohol. The paints dry quickly and will damage them if the paint dries on.
I hope that this hand painted wine glasses project has been fun for you. Now follow the manufacturer's instructions for curing and baking time.
Paint lots of them for your craft show or to give as gifts. Believe me, hand painted wine glasses are all the rage!! Just be sure you instruct the recipient that these are top rack dishwasher safe.
Tutorial Wrap Up
Creating hand painted wine glasses is such a pleasure. Did you enjoy this free tutorial? I enjoyed providing it to you.
This is just a small sample of what I have available for you to learn and grow as a painter. I would be delighted to provide you with information on Earmark Creative studio, my online membership. It provides everything you need to grow as a painter, no matter if you are a beginner or have painted for years. It provides video training and projects and so much more. Click the button below to learn more.
Here are the product links I promised you. You can find most of these items in your local craft or art supplies stores. These link are for your convenience. When you buy through my website I do earn a teensy weensy commission which goes towards bringing you more of what you love on this web site.
Glass Painting E-Books
CBP0001 - Martini Safari

CBP0016 Pinecones and Boughs

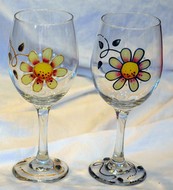
CBP0003 - Stained Glass Summer Daisy
CBP0010 - Holly And Berries Plate

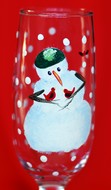
CBP0017 Polka Dot Snowman and Friends
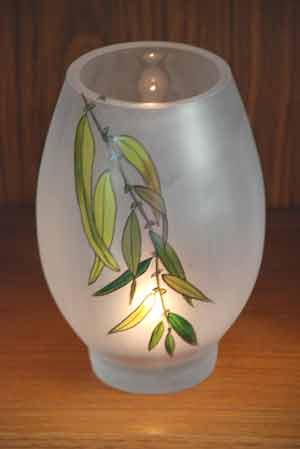
CBP0023 Weeping Willow Frosted Vase
Glass Painting Video
In this informative video, learn how to paint some wine glasses quick and easy! A lovely addition to your spring and summer home decor!
Here's where you can purchase the video.
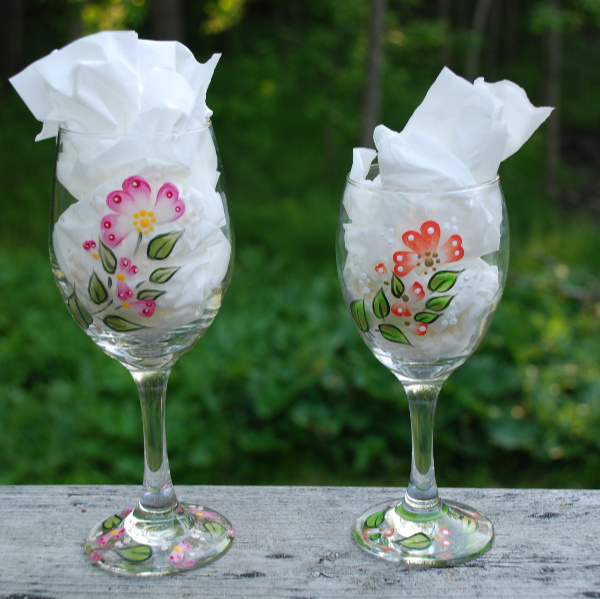
Here's another fun and very easy project for
Hand Painted Wine Glasses!
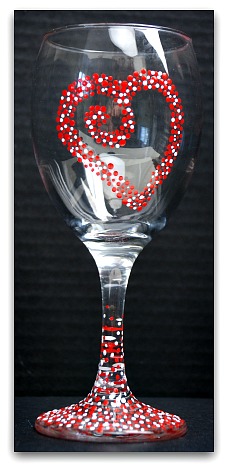


I wanted to create a hand painted wine glasses project that would require little effort or even any experience at all. So I decided that making dots would fit the bill!
For this project I used Americana Multi-Surface Acrylics Satin. I wanted to test the product to see if it performed as well as described on a surface as slick as glass.
After waiting 4 days for the paint to cure, I then baked the glasses in a 325F oven for the 30 minutes required.
I have hand washed the glasses in hot soapy water and I've had them in the top rack of my dishwahers. All of the little dots have remained! I'm very pleased with these paints.
So let's have fun doing these hand painted wine glasses!
You'll need some wine glasses... I get mine from Dollarama, Ikea or WalMart. They don't need to be expensive.
You'll need 2 Americana Multi-Surface Acrylics in colors of your choice. I used Cotton Ball and Red Barn.
You'll need a stylus tool. One end with a large point and the other end a small point.
I've created a little template for you to use but you could make your own heart shape and use it as a placement guide. Click here for the template and then print it out.
If you have hand lotion on your hands, wash it off.
Have on hand some 99% rubbing alcohol, paper towels, water container and a disposable foam plate.
Wash the glasses in hot soapy water, rinse well and dry. Wipe down the glasses thoroughly with the rubbing alcohol.
Cut out the template as close to the edges of the design as possible and then tape it to the inside of the glass.
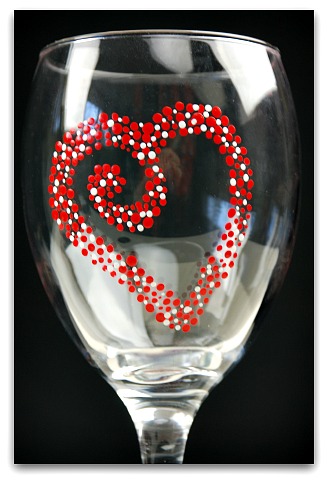
Place a small puddle of Red Barn on the foam plate. Place the large point of the stylus tool in the puddle and then begin dotting to outline the shape of the heart. Use the stylus over and over before re-loading it to create various size dots. Once you've got the outline, remove the template, then fill in the desigh with more dots.
Use the paper towel and water to clean the tip of the stylus.
Place a small puddle of Cotton Ball on the foam plate. Load the small end of the stylus to add more dots between the red ones.
Because dots take a long time to dry and you could accidentally smear them, use a hairdryer to help them firm up quickly. Let the glass cool completely and resume dotting.
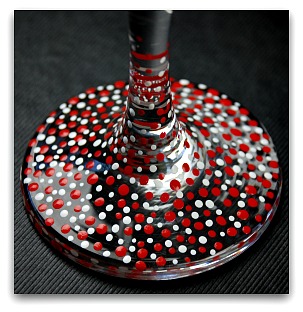
The foot of the wine glass is made up of dots just like you did for the heart. Again be careful not to stick your fingers in the wet paint.
I recommend you do all the hearts first, allowing time for them to dry well before handling the glasses again to do the base of the glass.
Follow the manufacturer's instructions for proper curing and heat setting. You need to place the glasses in a cold oven, close the door, set the temperature and when you've reached the correct temperature, set the timer for 30 minutes. Turn off the oven, keep the door closed until the oven is completely cooled.
I was thinking these would be nice in black and silver or gold dots too!
I do hope that you'll share some images of your hand painted wine glasses. I love to see how your projects turn out or how you've improved the design to make it your own style.
Now, go fill your wine glasses with your favorite wine!
If you enjoyed this small project you will find even more to enjoy at Earmark Creative Studio where I provide live and video Projects and Training for all levels of painters. Click the button below to learn how you can become the painter of your dreams.
Here I've made shopping convenient for you. Amazon has these products and if you buy through this web page I get a few pennies. It doesn't cost you any extra and it helps feed my cats. You can get these paints and tools at any craft store.
I'd love to see your wine glasses!
It would be so much fun to see everyone's projects!
What Other Visitors Have Said
Click below to see contributions from other visitors to this page...
valentines glasses 
I loved doing this! I did it a bit differently than yours but I'm actually kind of proud of myself it turned fairly decent. Thanks so much! I'm thinking …
OK, let's leave this hand painted wine glasses page and go to the Home page.
You Can Paint These Trees and More

Get Your Video Course Now
Introductory Price
Save 30% plus
a Money Back Guarantee


You Can Paint These Trees and More
Get Your Video Course Now
Introductory Price
Save 30% plus
a Money Back Guarantee
Recent Articles
-
CBP0012 Funky Winter Chicken
Apr 14, 26 03:18 PM
 You'll get your funky dance on with my Funky Winter Chicken e-Pattern Packet. Detailed step-by-step instructions, line drawings, pictures and materials ensure your success with this project.
 -
CBP0045 Stained Glass Coasters Pattern Packet
Apr 14, 26 03:16 PM
 This faux Stained Glass Coasters Pattern Packet will provide you with hours of fun creating and using these coasters.
 -
CBP0005-Daisies at Dusk
Apr 14, 26 03:06 PM
 We all love daisies and you will love painting Daisies at Dusk. This decorative painting e-packet also known as a tole painting e-pattern has detailed step-by-step instructions, lots of pictures, mate…
 -
CBP0004-Get-Crackin
Apr 14, 26 03:03 PM
 Here's Get-Crackin, an advanced, trompe loeil pattern packet. You will love the results you get. Detailed step-by-step instructions and lots of pictures.
 -
CBP0002-hey-tiger
Apr 14, 26 02:57 PM
 CBP0002-hey-tiger is a beautiful Eastern Tiger Swallowtail butterfly
 -
CBP0028-High Realism Poppy Pattern Packet
Apr 14, 26 02:49 PM
 Enjoy CBP0028-High Realism Poppy Packet. This project is guaranteed to please. Settle into a quiet place, add layers and watch this poppy come alive.
 -
CBP0007 Hoppin Hot Peppers
Apr 14, 26 02:42 PM
 Feel the sizzle with my Hoppin Hot Peppers Packet. Detailed step-by-step instructions, line drawings, lots of pictures. It's all here for your success.


Site Search
| site search by freefind | advanced |


You Can Paint These Trees and More
Get Your Video Course Now
Introductory Price
Save 30% plus
a Money Back Guarantee