Transferring Designs
and Tracing Patterns
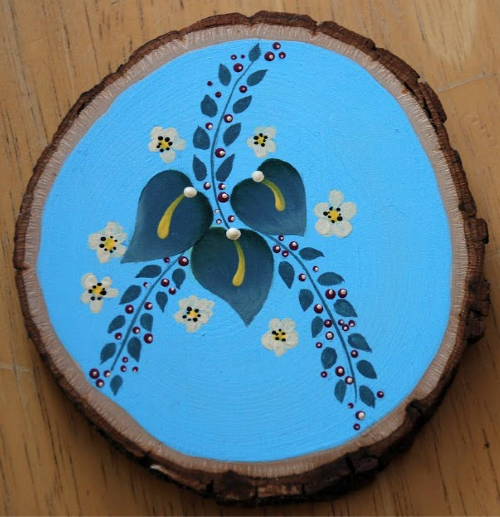
Transferring designs in decorative and tole painting is what we do because we mostly work from patterns and line drawings.
Whether it's your own design or you've purchased a book or pattern packet, we most often use design patterns and line drawings to decorate our surfaces.
Those line drawings or patterns are traced out onto tracing paper, which is a semi-transparent, lightweight vellum paper. Once a design has been traced out, the tracing paper is placed on top of the surface to be painted. From there we transfer the design elements using graphite paper.
TRACING
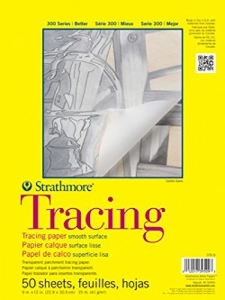
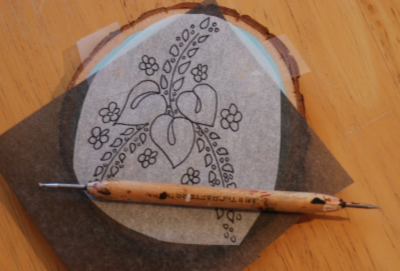
The first thing you do is trace out the design using tracing paper. This is the brand I use most but there are others to choose from.
Tracing paper comes in pads, as shown above, and on rolls. If you do a lot of decorative painting, it’s more economical to buy it by the roll. However, a pad of 50 sheets will go a long way.
When you trace a pattern, be sure to tape the tracing paper securely in place over the pattern. Usually the top two corners of the sheet. This ensures the tracing paper doesn't slide around as you're working.
Use a permanent fine tip marker to trace out the design. DO NOT use a ballpoint pen because the ink may smear onto your surface. When that happens, the ink is very difficult to remove, if not impossible. Also, DO NOT use a pencil. The graphite will smear onto your hand and get onto your surface making a royal mess.
Before detaching the tracing paper from the pattern, make sure you have all the design elements traced out. An easy way to do that is to lift the tracing slightly off the page and you’ll be able to see what you missed. Put the tracing down and finish tracing if need be.
TRANSFERRING DESIGNS
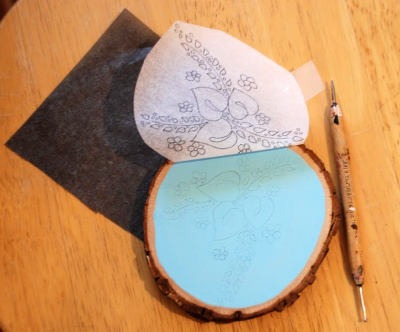
To transfer the design to your painting surface you’ll need some graphite transfer paper. Use grey graphite for light backgrounds and white graphite for dark backgrounds. Shown above is the grey graphite.
However, before you even start transferring the design here’s an important tidbit. If you are using a brand-new sheet of graphite paper, wipe it down with a dry paper towel. This will remove excess graphite from the sheet, making the transferred lines fainter and easier to erase after your painting is done.
Graphite paper can be used over and over again for transferring designs. As a matter of fact, the older it gets the better! There's less graphite so your transfers are not too dark right off the bat! So save your graphite paper for transferring designs later on!

Using a stylus tool, as shown here, or an empty ballpoint pen, begin to transfer the design by going over the lines as accurately as possible.
Check to make sure the design is transferring by lifting the tracing and graphite paper. If it’s not transferring, it means you’ve got the graphite paper facing the wrong way down. Best to check now than 20 minutes into all the details!
Don’t press too hard when you’re transferring designs. Some wood surfaces are soft and will retain the design grooves which can’t be fixed. Also, if you press too hard, the graphite will be too dark making it difficult to erase later. So, as you’re doing the transferring check to make sure you can see the design but that it’s not too dark. Light to medium pressure is all you need.
Once you’re confident you’ve done all the transferring, remove only the graphite paper. Check to make sure you’ve transferred everything. The tracing on top will reveal what you may have missed. In that case, slip the graphite back in place and continue.
When you’re finished, remove both sheets of paper. Keep them nearby.
If you need to re-position the tracing for any reason, place the tracing paper back in place, lining up all the design elements and secure it in place. Then slide the graphite back in place.
Too many times I see painters putting the graphite paper down first and then trying to position the tracing. Unfortunately, you can only see through the tracing paper but not the graphite paper!
STEP-BY-STEP
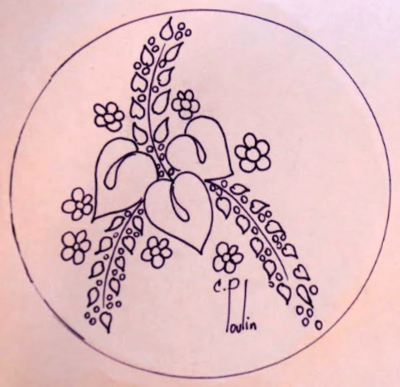
Here I've created a very simple line drawing that I'll be painting onto a wooden coaster. It was just a quick sketch to show you the best way for transferring designs.
First cut the tracing paper so that it's slightly larger than the design, then place it over the line drawing. You can see that the paper is semi transparent.

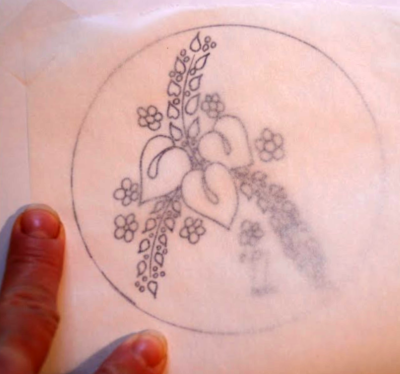
I'm using a permanent fine tipped marker to trace out all of the elements of this simple design. So far, so good!
Now the fun begins.
OK, let’s transfer the design onto a small coaster. Place the surface in front of you. Position the tracing over your surface. Tape it at the top on both corners to make a secure flap. Make sure everything is lined up as necessary.
Cut a piece of graphite paper down to a manageable size and slide it under the tracing.
Use the stylus to lightly go over the whole design, checking to make sure the pattern is transferring.
As you can see, the transferred pattern is on the coaster very faintly. If your graphite lines are very dark you'll have to erase them down to the point where they are faint.
So there you have it. You're all set to paint!
After the painting is all done, and everything has dried completely, erase all visible graphite lines. I use a kneaded gum eraser which is soft and won't damage the paint.
A Few Final Thoughts...
Did you find this instructional guide useful? I'd love to know.
If you pop down to the bottom of this page you can leave a comment or two for me. I read them all. Everyone can benefit from what you have to tell me.
Here's another way you can help... Would you like to share this with your friends? Use the Social Media links to the left to let them know. That would be great. Thanks.
If You Need Supplies...
Below, I have listed some of the items I used for this tutorial on transferring designs. They are links to Amazon placed here for your convenience.
If you buy any of these products by following the links, I do get a tiny commission... enough to help buy a few cans of cat food to feed the pusses! :O) But it does not cost you a penny, so we all win.
Introducing... Earmark Creative Studio

You Can Paint These Trees and More

Get Your Video Course Now
Introductory Price
Save 30% plus
a Money Back Guarantee
Click Here to Visit my HOME Page to see what else you can find.


You Can Paint These Trees and More
Get Your Video Course Now
Introductory Price
Save 30% plus
a Money Back Guarantee
Recent Articles
-
Earmark decorative painting studio in Ottawa! A cozy place to paint.
May 02, 26 03:28 PM
 Earmark decorative painting studio is a very comfortable and relaxing studio and classroom catering to all painting levels.Located in rural, scenic Ottawa.
 -
CBP0012 Funky Winter Chicken
Apr 14, 26 03:18 PM
 You'll get your funky dance on with my Funky Winter Chicken e-Pattern Packet. Detailed step-by-step instructions, line drawings, pictures and materials ensure your success with this project.
 -
CBP0045 Stained Glass Coasters Pattern Packet
Apr 14, 26 03:16 PM
 This faux Stained Glass Coasters Pattern Packet will provide you with hours of fun creating and using these coasters.
 -
CBP0005-Daisies at Dusk
Apr 14, 26 03:06 PM
 We all love daisies and you will love painting Daisies at Dusk. This decorative painting e-packet also known as a tole painting e-pattern has detailed step-by-step instructions, lots of pictures, mate…
 -
CBP0004-Get-Crackin
Apr 14, 26 03:03 PM
 Here's Get-Crackin, an advanced, trompe loeil pattern packet. You will love the results you get. Detailed step-by-step instructions and lots of pictures.
 -
CBP0002-hey-tiger
Apr 14, 26 02:57 PM
 CBP0002-hey-tiger is a beautiful Eastern Tiger Swallowtail butterfly
 -
CBP0028-High Realism Poppy Pattern Packet
Apr 14, 26 02:49 PM
 Enjoy CBP0028-High Realism Poppy Packet. This project is guaranteed to please. Settle into a quiet place, add layers and watch this poppy come alive.


Site Search
| site search by freefind | advanced |


You Can Paint These Trees and More
Get Your Video Course Now
Introductory Price
Save 30% plus
a Money Back Guarantee