Your Painting Basket Weave Pattern Tutorial
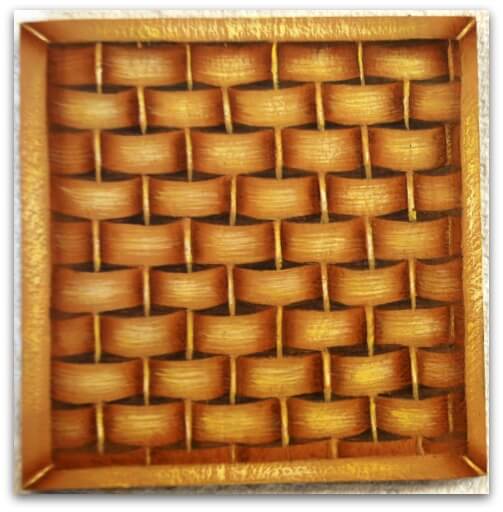
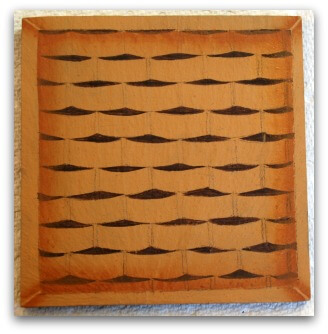
Here's how painting a basket weave pattern can be ever so easy. Featured here is one of four slate coasters measuring 4 inches square.
At first glance it looks like a woven coaster but that's just fooling the eye (trompe l'oeil).
I hope you'll give this a try.
Supplies
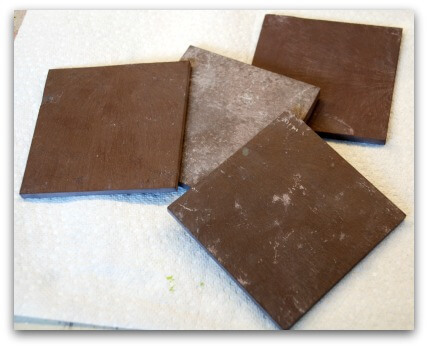
4 slate or wooden coasters, 4-inches square
Water basin
Disposable foam plate or wax palette
Paper Towel
Old Tea Towel, to cover your work surface
Tracing Paper
Grey Graphite Paper
Stylus
Hairdryer (optional)
Line Drawing
Get it here.
Americana Acrylics
Cocoa (DA259)
Raw Sienna (DA093)
Burnt Umber (DA064)
Cadmium Yellow (DA010)
Snow (Titanium) White (DA01)
Brushes
#16 Flat
#1 mid-length Liner
1" Flat
#5 Round
1/4" Filbert Comb
Here we go painting basket weave pattern!
Download the line drawing and trace it onto the tracing paper. Put it aside.
Wash the slate coasters in warm soapy water, rinse and dry completely. If you're painting on wooden coasters you'll need to sand them, tack off the dust and seal the wood and dry it. Sand it again and remove all dust.
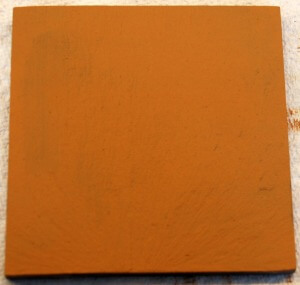
Using the 1-inch brush, basecoat the coasters with Cocoa. 2-3 coats will be plenty.
Position the tracing over a coaster and trace out the design.
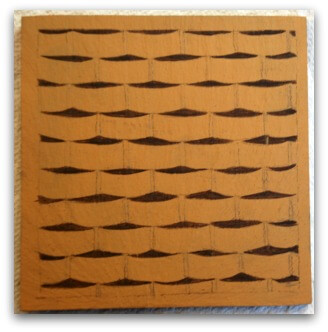
When you have that done, basecoat the spaces between the rows with Espresso. Use the Round brush or the Liner.
When that dries you'll need to float around the inside perimeter of the square with Raw Sienna.
In the image above I've done 2 very wide floats of Raw Sienna using the 1-inch brush. I then shaded the "ribs" at each corner with the #16 Flat brush.
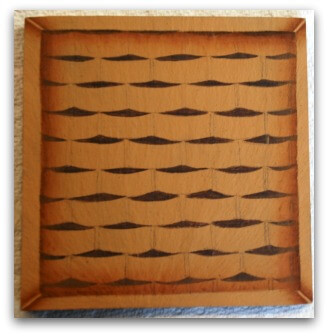
Here I've reinforced the shading with narrower floats of Burnt Umber.

Using the Liner brush I painted the vertical ribs back on. They disappeared when I basecoated the spaces between the rows.
Once those are in place you need to shade BOTH sides of the ribs first with Raw Sienna, twice. Then reinforce with narrower floats of Burnt Umber. This is shaping up nicely!!
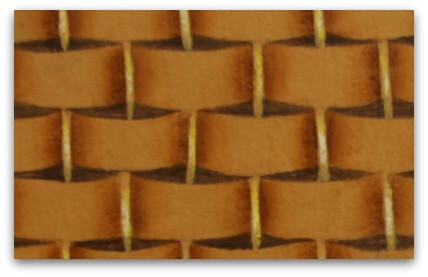
The next step is to dry brush a highlight on the ribs, using the Liner brush and Cadmium Yellow. Then repeat with a smaller highlight of just White.
The final highlights are on the woven strips and outer edges. Use the Filbert Comb and thinned Cadmium Yellow to add streaks of color. Sweep gently and repeat until you get a nice highlight. Then repeat with a smaller highlight of White.
Use the Round brush to dry brush Cadmium Yellow along the outer edges and then repeat with a smaller White highlight.
I hope you enjoyed this little project. It looks really nice on the kitchen table. Feel free to make the pattern fit a larger surface. Have fun with it. Change up the colors. Whatever!
OK, let's go from this page back to the TECHNIQUES page.
You Can Paint These Trees and More

Get Your Video Course Now
Introductory Price
Save 30% plus
a Money Back Guarantee


You Can Paint These Trees and More
Get Your Video Course Now
Introductory Price
Save 30% plus
a Money Back Guarantee
Recent Articles
-
Earmark decorative painting studio in Ottawa! A cozy place to paint.
May 02, 26 03:28 PM
 Earmark decorative painting studio is a very comfortable and relaxing studio and classroom catering to all painting levels.Located in rural, scenic Ottawa.
 -
CBP0012 Funky Winter Chicken
Apr 14, 26 03:18 PM
 You'll get your funky dance on with my Funky Winter Chicken e-Pattern Packet. Detailed step-by-step instructions, line drawings, pictures and materials ensure your success with this project.
 -
CBP0045 Stained Glass Coasters Pattern Packet
Apr 14, 26 03:16 PM
 This faux Stained Glass Coasters Pattern Packet will provide you with hours of fun creating and using these coasters.
 -
CBP0005-Daisies at Dusk
Apr 14, 26 03:06 PM
 We all love daisies and you will love painting Daisies at Dusk. This decorative painting e-packet also known as a tole painting e-pattern has detailed step-by-step instructions, lots of pictures, mate…
 -
CBP0004-Get-Crackin
Apr 14, 26 03:03 PM
 Here's Get-Crackin, an advanced, trompe loeil pattern packet. You will love the results you get. Detailed step-by-step instructions and lots of pictures.
 -
CBP0002-hey-tiger
Apr 14, 26 02:57 PM
 CBP0002-hey-tiger is a beautiful Eastern Tiger Swallowtail butterfly
 -
CBP0028-High Realism Poppy Pattern Packet
Apr 14, 26 02:49 PM
 Enjoy CBP0028-High Realism Poppy Packet. This project is guaranteed to please. Settle into a quiet place, add layers and watch this poppy come alive.


Site Search
| site search by freefind | advanced |


You Can Paint These Trees and More
Get Your Video Course Now
Introductory Price
Save 30% plus
a Money Back Guarantee