- Home
- Fabric Painting
- Fabric Paint Tutorial
Fabric Paint Tutorial
This is a fabric paint tutorial which began with a sad story...
Have you ever ruined a brand-new piece of clothing on the very first day you put it on?
I had just put on a new, comfy, oversize sweatshirt after a warm shower on a late Friday afternoon. Ahhhh, so cozy.
At dinnertime, I proceeded to fry up some pork chops on the stove. When it came time to flip the chops, one of them slid from my tongs and landed in the buttery fat, splashing grease down the front of my new top! I was not happy to say the least.
I tried to scrub the stains out with every agent promising to remove stains. Alas, the stains remained. Which of course meant that yet one more item from my small wardrobe would be relegated to a work / painting shirt. And I already have too many of those!
I really loved the feel of this top and I wanted to wear it! So, I thought, “What if I paint over the grease spatters? What would that look like? I’ve got nothing to lose!”
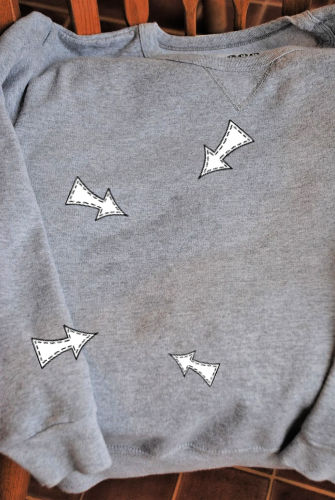
In this photo you can just make out the stains but in person the stains really stand out.
So here's a short fabric paint tutorial.
I washed and dried the top without fabric softener. For more on preparing fabric for painting here's where you can learn more.
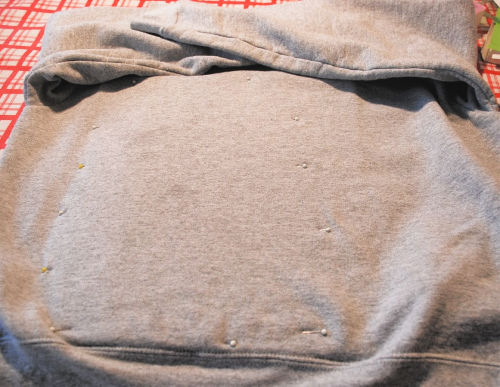
Then I slid a piece of cardboard inside the top and I secured the area to be painted with some straight pins. I didn't pull on the fabric but I did pin it so the fabric was not going to slide around.
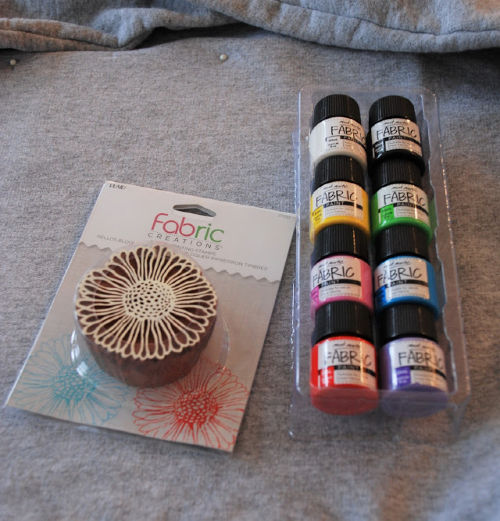
I decided to use a block printing stamp and some fabric paint.
It was my first time trying out Mont Marte Fabric paints and I really enjoyed the product.
The block printing stamp is made by Fabric Creations. I just love this flower! But there are more designs to choose from.
To apply the fabric paint, use a makeup sponge to dab the paint onto the stamp to make sure the paint is evenly distributed.
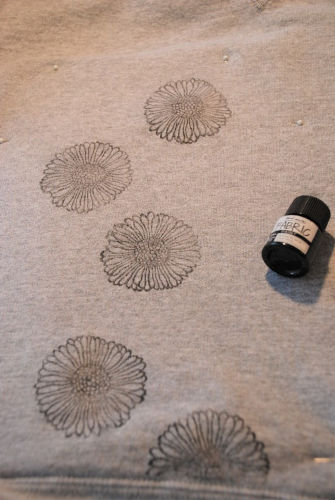
Use Black to stamp on the flowers. Press the stamp firmly onto the fabric
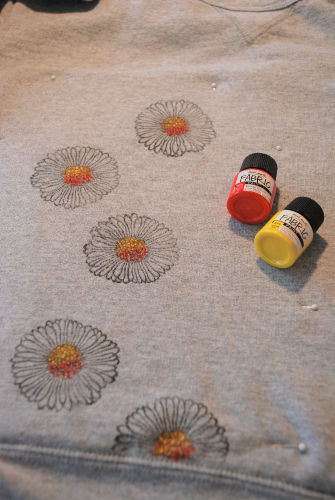
Using a #4 Round brush, add small dabs of Red paint to the lower area of the flower centers and some Yellow on the top area. To brighten the yellow highlight, mix in a bit of White. NOTE: The paint will be absorbed by the fabric, so repeat as needed.
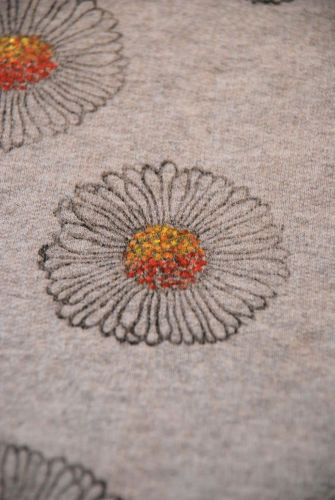
Here's a close up of the dabby dots in the center of the flowers.
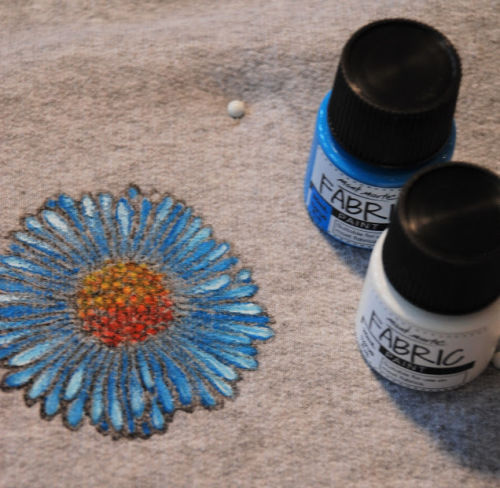
Use the #4 Round to apply your choice of paint colors inside the lines of the stamped image. Here I've used Blue and White.
Start with Blue. The paint will remain wet for a while. Add White to some petals. The two colors will blend to create a lighter blue. Add more White to create highlights.
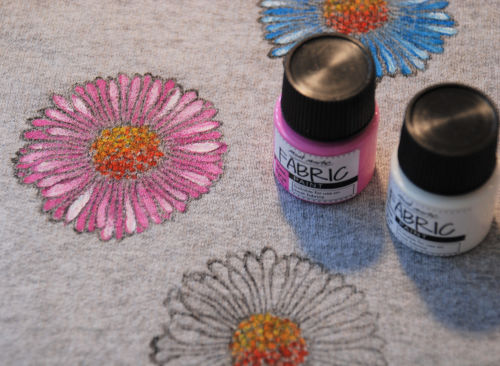
Follow the same instructions with Pink and White.
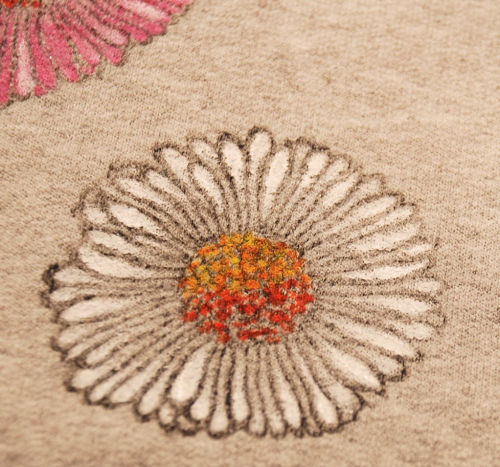
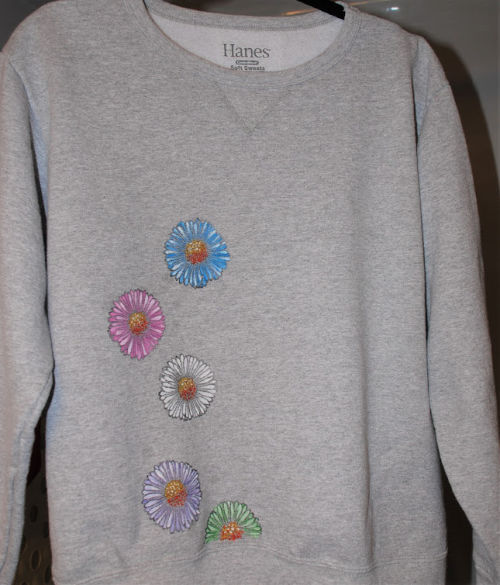
Here, only White was used... and I sort of wish I'd done all of the flowers just in White! I'm sure there will be other "ruined" tops for me to paint white daisies!!
For the remaining flowers I used Lavender and White and for the half flower I used Green and White.
To complete the project, allow the fabric to dry completely.
To set the fabric paint permanently, place a cotton cloth over the design and iron at !00C for 3 to 5 minutes.
Although my stamping didn't completely cover the stains, the flowers draw the eye away from the mess and I can now wear my top... just not when I'm cooking!
For your shopping convenience, the Amazon link below is where you can find the Mont Marte fabric paint.
Introducing... Earmark Creative Studio

You Can Paint These Trees and More

Get Your Video Course Now
Introductory Price
Save 30% plus
a Money Back Guarantee


You Can Paint These Trees and More
Get Your Video Course Now
Introductory Price
Save 30% plus
a Money Back Guarantee
Recent Articles
-
Earmark decorative painting studio in Ottawa! A cozy place to paint.
May 02, 26 03:28 PM
 Earmark decorative painting studio is a very comfortable and relaxing studio and classroom catering to all painting levels.Located in rural, scenic Ottawa.
 -
CBP0012 Funky Winter Chicken
Apr 14, 26 03:18 PM
 You'll get your funky dance on with my Funky Winter Chicken e-Pattern Packet. Detailed step-by-step instructions, line drawings, pictures and materials ensure your success with this project.
 -
CBP0045 Stained Glass Coasters Pattern Packet
Apr 14, 26 03:16 PM
 This faux Stained Glass Coasters Pattern Packet will provide you with hours of fun creating and using these coasters.
 -
CBP0005-Daisies at Dusk
Apr 14, 26 03:06 PM
 We all love daisies and you will love painting Daisies at Dusk. This decorative painting e-packet also known as a tole painting e-pattern has detailed step-by-step instructions, lots of pictures, mate…
 -
CBP0004-Get-Crackin
Apr 14, 26 03:03 PM
 Here's Get-Crackin, an advanced, trompe loeil pattern packet. You will love the results you get. Detailed step-by-step instructions and lots of pictures.
 -
CBP0002-hey-tiger
Apr 14, 26 02:57 PM
 CBP0002-hey-tiger is a beautiful Eastern Tiger Swallowtail butterfly
 -
CBP0028-High Realism Poppy Pattern Packet
Apr 14, 26 02:49 PM
 Enjoy CBP0028-High Realism Poppy Packet. This project is guaranteed to please. Settle into a quiet place, add layers and watch this poppy come alive.


Site Search
| site search by freefind | advanced |


You Can Paint These Trees and More
Get Your Video Course Now
Introductory Price
Save 30% plus
a Money Back Guarantee