PREPARING and CLEANING GOURDS
Whether you're cleaning gourds to paint on or preparing gourds to
provide a little shelter for the birds, here are 4 simple steps to
follow.
Cleaning Gourds Part 1
A cleaning solution of 1 part bleach mixed with 10 parts water is recommended.
Dunk the dried gourd in the solution to get it wet all over. With a medium bristle brush or a kitchen scrubby, you can then rub off all the mold and mildew.
If it's stubborn, re-dunk and scrub some more. Let it dry thoroughly... oh, and try not to be in a hurry. Cleaning gourds requires some patience.
When you're 100% sure it's dry, you can cut holes in it or carve it any way you like. (There's more information on how to cut a gourd further down this page.)
If the gourd is going outdoors, then make sure you apply Thompson's Water Seal to the inside by pouring some in and swirling it around to cover.
Then brush the water seal all over the exterior and any cut edges. Skip the water sealer for gourds used indoors.
Here's a quick tip: You may want to suspend the gourds by tying string to the stem and hanging them out of the way while they dry.
Introducing... Earmark Creative Studio

#2
Gently sand the gourd with 100-150 grit sandpaper.
Just do a light sanding to provide some "tooth" over the smooth surface.
#3
If you're going to use the gourd outside as a nesting box or birdhouse then use a good quality exterior latex primer. Only prime the areas you'll paint on.
Don't apply primer to the interior. If the gourd will be used
indoors, just skip the primer. Let dry completely. Now it's ready for
decorative painting!
#4
After cleaning gourds, drying them and painting them... whew... it's time to protect your hard work!
Best thing to do is to apply 2 to 3 coats of a high quality exterior gloss varnish for any gourd used outdoors. For indoor use, just varnish with your preferred acrylic-based varnish.
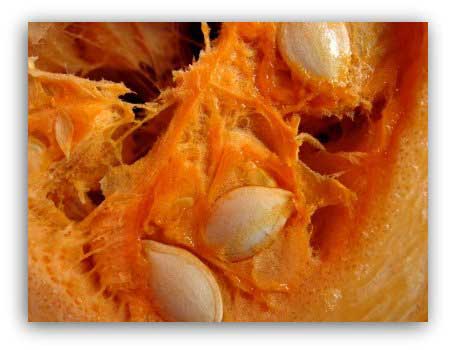
Cutting Gourds
Gourds must be cleaned before cutting can begin.
When you cut into a dried gourd wear a face mask... the resulting dust is more
than an irritant, it is caustic. Goggles aren't a bad idea either!
You can use drills, keyhole saws, X-Acto knives or box cutters...
anything really sharp to make holes or to carve a gourd. Hhhhmmmm,
maybe you should wear protective gloves too!
If the hole you've cut is small, you'll need to remove the membrane and
seeds with a wire coat hanger or a long-handled metal spoon... maybe
even a screwdriver.
If the gourd has a large opening or is being used as a bowl, then just
use your hands or a large soup spoon to scrape everything off. Once
you've got most of the stuff out, you can sand it smooth if needed.
Honestly? Painting gourds is a lot more fun than cleaning them!!! For more on cleaning gourds,
contact us here.
Want to learn more?
Let's leave Cleaning Gourds and go to Gourd Painting.
Return to our Decorative Painting Home Page.
You Can Paint These Trees and More

Get Your Video Course Now
Introductory Price
Save 30% plus
a Money Back Guarantee


You Can Paint These Trees and More
Get Your Video Course Now
Introductory Price
Save 30% plus
a Money Back Guarantee
Recent Articles
-
Earmark decorative painting studio in Ottawa! A cozy place to paint.
May 02, 26 03:28 PM
 Earmark decorative painting studio is a very comfortable and relaxing studio and classroom catering to all painting levels.Located in rural, scenic Ottawa.
 -
CBP0012 Funky Winter Chicken
Apr 14, 26 03:18 PM
 You'll get your funky dance on with my Funky Winter Chicken e-Pattern Packet. Detailed step-by-step instructions, line drawings, pictures and materials ensure your success with this project.
 -
CBP0045 Stained Glass Coasters Pattern Packet
Apr 14, 26 03:16 PM
 This faux Stained Glass Coasters Pattern Packet will provide you with hours of fun creating and using these coasters.
 -
CBP0005-Daisies at Dusk
Apr 14, 26 03:06 PM
 We all love daisies and you will love painting Daisies at Dusk. This decorative painting e-packet also known as a tole painting e-pattern has detailed step-by-step instructions, lots of pictures, mate…
 -
CBP0004-Get-Crackin
Apr 14, 26 03:03 PM
 Here's Get-Crackin, an advanced, trompe loeil pattern packet. You will love the results you get. Detailed step-by-step instructions and lots of pictures.
 -
CBP0002-hey-tiger
Apr 14, 26 02:57 PM
 CBP0002-hey-tiger is a beautiful Eastern Tiger Swallowtail butterfly
 -
CBP0028-High Realism Poppy Pattern Packet
Apr 14, 26 02:49 PM
 Enjoy CBP0028-High Realism Poppy Packet. This project is guaranteed to please. Settle into a quiet place, add layers and watch this poppy come alive.


Site Search
| site search by freefind | advanced |


You Can Paint These Trees and More
Get Your Video Course Now
Introductory Price
Save 30% plus
a Money Back Guarantee