Crackle Glass Vase and More!
I love the look of a vintage crackle glass vase. Those cracks, crazes and fissures add so much interest to an otherwise plain glass vase.
How could I, as a devoted upcycler, make my own contemporary crackle glass vase? And save gobs of moolah at the same time?
What about that foggy wine glass I was about to throw away? Maybe I could make something from that?
Enter a fun glass crackle medium...
NOTE:
THESE ARE SOLVENT BASED PRODUCTS.
PLEASE WORK IN A WELL VENTILATED AREA.
KEEP CHILDREN AND PETS AWAY WHILE YOU WORK.
What you'll need:
- Vitrail Crackling Effect Kit
- Vitrail Transparent colours of your choice
- Make up wedge or other dense sponge applicator
- 1-inch soft, flat brush
- Glass surfaces of your choice
- Nitrile gloves (optional)
-
Mineral Spirits, like Gamblin Gamsol Odorless mineral spirits
- Glass beads (optional)
- Sequin Yarn (optional)
- Disposable foam plates
- E-6000 Adhesive (optional)
- White Glue (optional)
- Wooden Craft stick or palette knife to stir paint
Here we go! Step-by-step...
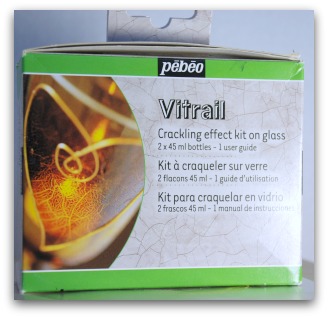
Here's what I did using the Vitrail Crackling Effect Kit by Pébéo. I should mention that the crackle medium is a 2-part system which is applied over a layer of Vitrail Transparent paint. So here goes...
Wash the surface(s) in warm soapy water. Rinse and dry. Wipe it down with rubbing alcohol. Be sure your hands are free of oil. I wear gloves for this reason.
Before using the paint, be sure to stir it thoroughly with a wooden craft stick or palette knife. Then pour a dollop on a foam plate.
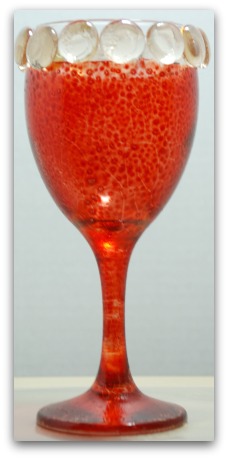
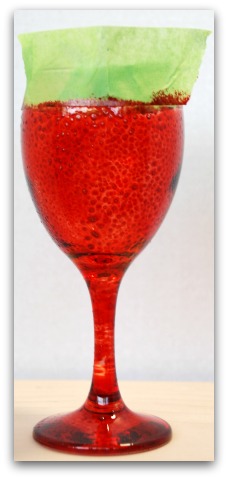 Sponge on Transparent Vitrail Crimson
First I used a small disposable sponge to apply 1 even coat of Transparent Crimson (#12) to the wine glass. Before I did that, I masked off the top about 3/4-inches down.
Then with a fresh sponge, I applied 1 even coat of Transparent Vitrail Turquoise Blue (#17) all over a large recycled jar of Dijon mustard. I love the ginger jar shape and I couldn't bear to part with it!
You'll see the results further down. I totally forgot to take a picture. Duh!
At first I wasn't sure about the pebbly texture I got from using the sponge as an applicator but it quickly grew on me! But then I wondered if it would interfere with the crackled look. Oh well. Too late now. Let's see how it goes.
CLEAN YOUR BRUSH IN MINERAL SPIRITS
BEFORE IT DRIES
After cleaning the brush in the mineral spirits, wash it in cool soapy water, rinse and lay flat to dry. Do this every time you're done using the brush. Make sure it's completely dry before using it again.
As for the sponges, just toss them.
After waiting one hour, as instructed, I touched the surface and it was tacky. Perfect!
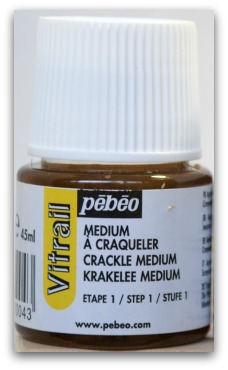
Once tacky then that's when you apply the Crackle Medium labelled "Step 1". For this part I used the soft, flat bristle brush. I applied the medium all over evenly, in every direction.
(Don't forget to clean your brush right away.)
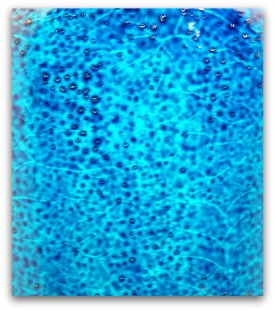
I watched, with anticipation, for 15 minutes to pass and sure enough, there it was! Although I could barely make it out, indeed the Turquoise paint was beginning to crackle. And so was the Crimson. Nothing major but it was something.
I knew I'd be waiting an interminable 24 hours for the full effect to materialize.
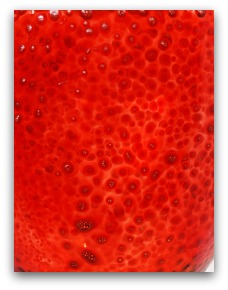
The image below shows the difference with a brushed-on application.
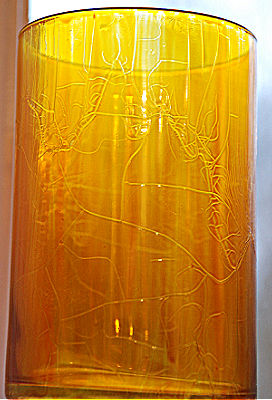
Here I've used a soft flat brush to apply the paint. You can see some streaks but it adds to the charm. I was a little heavy handed with the crackle medium, so next time I will apply a little less.
As you can see, the cracks are much more defined.
NOTE: Working on a vertical surface, as I did, may have contributed to the drips which is even more reason to use a thinner application.
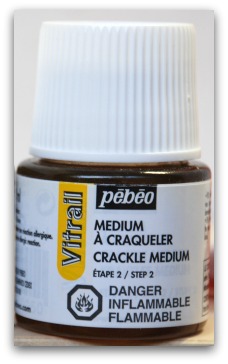
So now to protect the lovely crackles! Use the flat brush to apply a uniform coat of the Medium Step 2. (Clean the brush.)
Once dry, embellish the objects as you'd like.
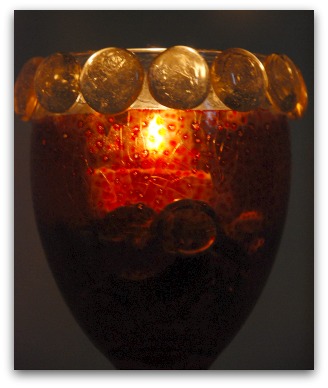
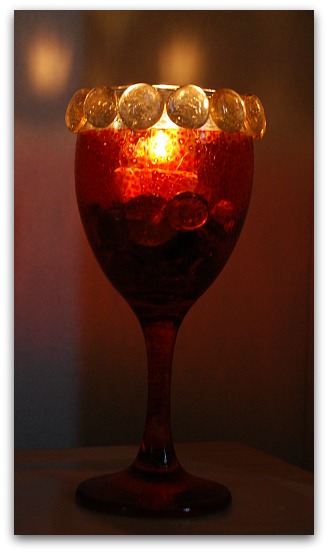
Here I've adhered clear glass beads to the top of the glass where I had masked it off. I knew once I had a candle inside that the clear beads would refract light on nearby walls as shown at the top of this page.
I used the E-6000 adhesive to secure the beads.
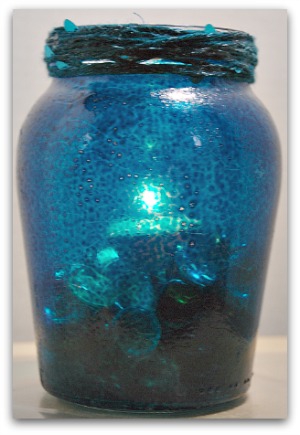
Here's the crackle glass vase. Nice huh?
To conceal the screw top, I wrapped many layers of sequined yarn around it. First I tied a tight loop around the top. Then I used a touch of white glue here and there to keep the yarn from unraveling.
I added clear beads inside the crackle glass vase and added a lit votive. The photo does not do it justice!
This product is to be used for decorative purposes only.
Your crackle glass vase and wine glass must not be heat set.
DO NOT try to cure it in the oven.
DO NOT soak in water.
However you may use a glass cleaner for a quick wipe down.
To make shopping easier I'm including links that may be helpful. These are most of the products I used. If you can, shop locally to support a small business. However, if that's not possible use these links for your convenience. And when you do, I earn a teensy commission which helps me feed my cats and keeps me in art supplies!
OK, let's leave the crackle glass vase page and go back to the Vitrail Paint page.
Take me to the glass paint page.
You Can Paint These Trees and More

Get Your Video Course Now
Introductory Price
Save 55% plus
a Money Back Guarantee


You Can Paint These Trees and More
Get Your Video Course Now
Introductory Price
Save 55% plus
a Money Back Guarantee
Recent Articles
-
Preserving artwork
Apr 18, 24 03:38 PM
Cheryl, Is it necessary to spray artwork with an acrylic spray if I use a quality canvas listed as “archival”? Cheryl, are you still writing newsletters? -
Can you paint more after setting in oven?
Feb 16, 24 06:36 AM
 Hi there I had taken a class and painted a wine glass, then set the paint in the oven. Can I add more paint or designs and re-sent again in the oven?
 -
gallery glass
Dec 11, 23 07:44 AM
Can Gallery Glass be restored if it has thickened? -
gallery glass
Sep 19, 23 07:44 AM
Can Gallery Glass be restored if it has thickened? -
Looking to commission an artist to paint a milk churn for me!
Sep 19, 23 07:43 AM
Greetings I am looking to commission a recognized artist in this field do you or someone you could recommend my name is Lesley Kelly Cell 403 512 8911 -
GLAZE FINISH - what is available now?
Sep 19, 23 07:42 AM
As you said, Delta PermEnamels are discontinued. I would finish off fixing my ceramic vintage pieces with their glaze (either clear gloss or satin). -
Glass Paint Temperature Considerations?
May 15, 22 11:10 AM
I’m wondering how durable glass paint/faux leading is giving shifting temperatures? Or, if some glass paint brands are better for this than others? For
Site Search
| site search by freefind | advanced |


You Can Paint These Trees and More
Get Your Video Course Now
Introductory Price
Save 55% plus
a Money Back Guarantee
New! Comments
Have your say about what you just read! Leave me a comment in the box below.