ARTIST TRADING CARDS
 Self Portrait
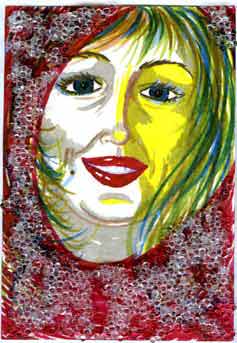
Title: Bubbly Personality - ATC by Cheryl Poulin
Self Portrait
Title: Bubbly Personality - ATC by Cheryl PoulinI thought everybody knew about artist trading cards (ATCs). But I was totally wrong!
So for those of you who are curious about making them and trading them, this page is for you.
Let's just start with the one and only rule for ATC's
...they can be no larger and no smaller than 2-1/2 inches by 3-1/2 inches.
A Brief History of ATCs
There’s history going back to the 16th century where miniatures or art cards were painted and sold. They were sort of the equivalent of today’s wallet photos or pics you have on your phones. But going back that far may be a bit dull, so…
A century later, art cards were favored in Europe for advertising purposes. Yawnnn…..
OK, OK, moving right along … so now it’s the early 1900’s. Baseball is in full swing. Kids start collecting the baseball cards that come with their packs of gum. In the 1960’s, the cards were standardized to a size of 2-1/2” x 3-1/2” (64mm x 89mm), which is still in effect today.
Although these cards were mass-produced, collectors were and continue to be crazy for them. Kids of all ages trade or buy and sell cards at trade shows, exhibitions and on the Internet. It’s amazing what some folks will do and pay to get their hands on a Babe Ruth rookie card! The same goes for hockey cards … actually all sports cards!
Trading Little Bits of Art
Now picture the excitement of this trading frenzy. Then plant the idea in some guy’s head that creative people could trade little bits of art among themselves. And that’s just what happened in 1997.
The Zurich artist, m. vanci stirnemann began a project with exactly this in mind. I love the way artistic people think! He created and exhibited 1200 cards (the size of sports cards) and he then encouraged people to trade their own cards for his.
The whole idea of trading art cards has since spread like wildfire. Add the Internet, and the Artist Trading Card concept has now touched the far reaches of the world.
Imagine trading your artwork with someone you’ll probably never meet from places you may never see. There’s no critiquing, no judgment … just art for its own sake. Yeah, now that’s exciting!
So, there you have it, a condensed history of Artist Trading Cards. Neat, huh?
For a step by step demonstration to get you started, have a look at my mini lesson; kind of a simple, virtual artist trading cards workshop.
Little Canvases
What I love about ATCs is that you don’t need art classes or drawing lessons. You can paint them using watercolors, oils or acrylics. You can use photography … or if you like to sew, you can make fabric ATCs! You can collage or decoupage, rubber-stamp and stencil. Use wax crayons, colored pencils or pen and ink. The only rule is the size, 2-1/2” x 3-1/2” (64mm x 89mm). No bigger, no smaller.
Whether they're called Pocket Art, Miniature Art or Art in Your Pocket, Artist Trading Cards are fun to have, fun to create, fun to trade and they are here to stay!
These little canvases, as I like to think of them, are traded around the whole world! That just amazes me. From crafters to amazing fine artists, artist trading cards carry along our artful messages around the entire globe.
On this page, you'll see some step-by-step creations of artist trading cards.
The ATC featured above is from a theme called "Self Portrait". It's titled "Bubbly Personality". Yep, that's my attempt at drawing myself! Oh well!
For your viewing pleasure, you can access the Artist Trading Card Gallery. You'll be amazed at the imagination of some of these artists!
I'll keep adding more and more artist trading cards as I collect them.
Making Artist Trading Cards
Step-by-Step
Making ATCs is easy. All you need is a pretty vivid imagination, lots of doodads, old pieces of yarn, lace,pretty papers... you get the idea. Anything goes!
Because I was making cards for the purpose of a demonstration it seems I just couldn't think of a theme for myself. Not that you need one, but I wanted to have one. So I asked my unsuspecting husband, out of the blue, "Give me a theme!"
Shooting me a perplexed look, I explained further. "I'm making artist trading cards for the website and I can't think of a topic."
He said, "Life's mysteries." I don't know if he was being sarcastic but I took it to mean that the theme would be "mysterious". Off I trotted.
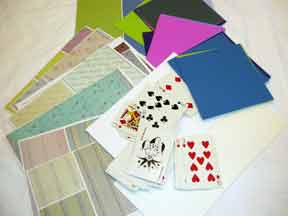
First you have to select the "support" for your ATC. You can choose sturdy card stock, plain or colored. Sometimes you can find playing cards that are just the right size. Also, 140lb hot or cold pressed watercolor paper is great.
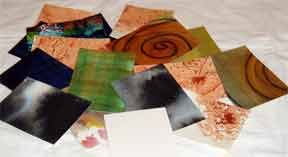
I love to use hand-painted cardstock and I precut a whole stack of supports so that I'm ready for any trading opportunity. Sometimes the design on the decorated cardstock itself will dictate what my theme will be.
Make an ATC Viewfinder
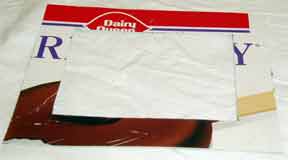
Shown here is an ATC viewfinder that I made. By positioning it over a large sheet of hand-painted cardstock I can choose areas that I really like. Then I trace inside the viewfinder with a sharp pencil and I cut out my cards.
To make an ATC viewfinder, cut out a piece of sturdy cardboard measuring 4-inches by 5-inches. Cut out a window in the middle that measures 2-1/2- inches by 3-1/2 inches.
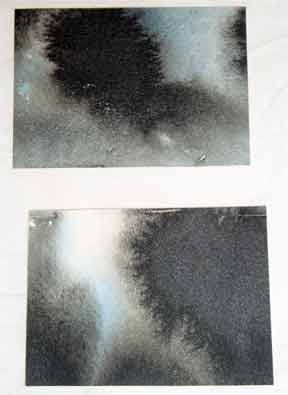
I chose these two pre-cut hand-painted cards. The color was moody and perfect for what was beginning to form in my mind.
I started to think about things that were mysterious...
At least, mysterious to me. You would likely choose very different objects and that's part of the fun. Everyone creates their own interpretation of a theme.
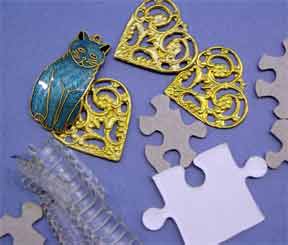
So I picked out some of my collectibles and stuff, referred to as ephemera, pronounced eff-fem-eera...or something like that. Notice the old cat earring, puzzle pieces, snake skin, and brass hearts (love is mysterious, don't you think?).
This was a good start. Sometimes I'll use the ephemera I've selected, other times it just sits there as I dig for better goodies.
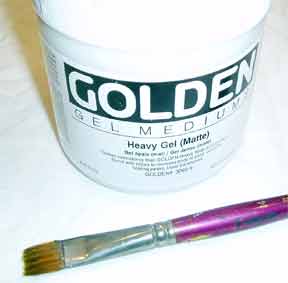
To glue down papers and fibers and lightweight objects I really like to use Golden Matte Gel Medium.
Some people use glue sticks for paper to paper glueing, but I have found that this type of glue in time becomes brittle and the integrity of the cards is compromised. Things start to come unglued.
I want my artist trading cards to travel the world, to get handled a lot, and to last a lifetime. So I use the Golden Gel.
To apply the glue, use an old brush and clean up with soap and water. Don't let the gel dry in the brush. Rinse and blot dry the brush as you work.
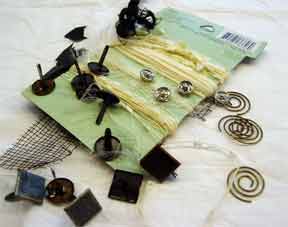
Rooting through more of my ephemera I select fibres, threads, brads, European paperclips (those spiral brass doo-hickeys) and drywall mesh tape that's seen better days.
I am now poised and ready to create one or two artist trading cards with the theme "Mysterious".
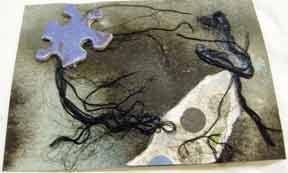
I found a torn piece of polka dotted paper. It wasn't cutesy polka dots and I liked the blue and grey. Then I glued down some black fibres in an unplanned way. Just wherever the fibres landed was where they got glued down. Then I selected a blue puzzle piece and glued it down.
So far so good.
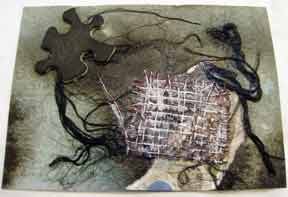
I cut a square of old drywall tape and glued it down. When it was dry, I drybrushed some white acrylic paint across the mesh. I just loaded a dry flat brush into white, wiped the brush and dragged it lightly across the drywall tape.
When I did that, the blue of the puzzle piece was irritating to me, so I painted it with black acrylic paint. The little canvas was suddenly way too dark. I needed a neutral unifying something.
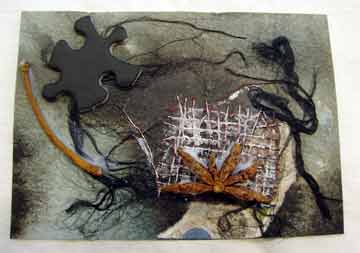
Up to the spice cabinet in the kitchen I went. Star anise... that's what this needs. I found my jar of that licorice-scented seed pod.
I selected a half star anise and glued it on top of the mesh. This caused some imbalance. So I found a dried stem among the pods and glued it down on the left-hand side.
The finished ATC!!!
There you have it. I was going to make multiple artist trading cards, but I ran out of time. Trust me though, I'll be making more!
There's one last thing...
On the back of the ATC you need to write down the following:
The theme, if there is one. In this case "Mysterious".
The title, if you have one. In this case, "Untitled".
The artist's name, Cheryl Poulin.
Where you can be reached: Phone number is optional but e-mail or your website is a good idea.
And then sign your miniature work of art!
Here's another free tutorial or "mini-workshop". Check it out!
While you're here, sign up for my free newsletter where I keep you up to date on everything artsy and creative. Subscribe to The Creative Chronicles today!
And here's my handy dandy contact form if you have any questions.
That's all there is to it! Let's get back to the HOME page.
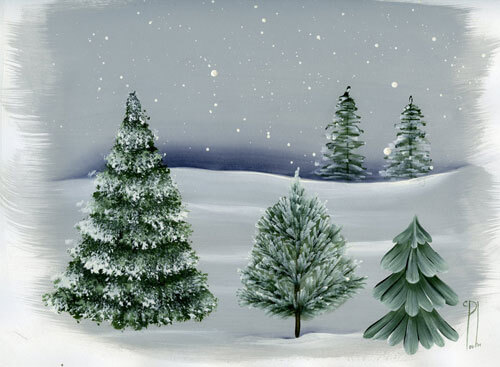
You Can Paint These Trees and More

Get Your Video Course Now
Introductory Price
Save 30% plus
a Money Back Guarantee


You Can Paint These Trees and More
Get Your Video Course Now
Introductory Price
Save 30% plus
a Money Back Guarantee
Recent Articles
-
How To Paint Trees – Detailed Instructions
May 15, 25 09:29 AM
 Want to learn how to paint trees? This very detailed video course will show you how to paint 7 different trees. You will amaze yourself and enjoy these techniques every time you use them.
 -
Earmark decorative painting studio in Ottawa! A cozy place to paint.
Apr 13, 25 04:08 PM
 Earmark decorative painting studio is a very comfortable and relaxing studio and classroom catering to all painting levels.Located in rural, scenic Ottawa.
 -
Gorgeous, free glass painting patterns that are simple to do!
Apr 13, 25 03:41 PM
 Here are some free glass painting patterns that are quick and easy. Elegant, affordable and oh-so-do-able!
 -
How to make a collage in a few easy steps.
Jan 27, 25 01:13 PM
 Master how to make a collage with my simple step-by-step tutorial. Lots of pictures and free downloads too!
 -
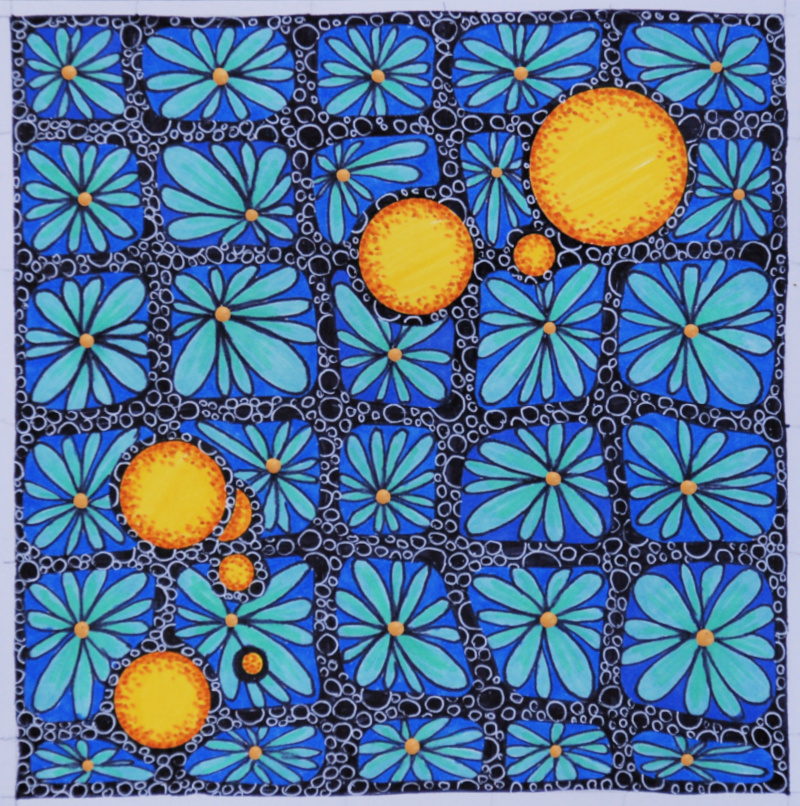
Doodling art for adults, a creative outlet for deep relaxation.
Dec 08, 24 02:20 PM
 A doodling art for adults workshop because adults need to have some fun too! We’ve forgotten how to breathe deeply and relax. Come for the day.
 -
Define a Pudmuckle
Nov 02, 24 06:43 AM
Can you tell me what a pudmuckle is? I thought the term described a tole painting stroke, but I cannot find it listed or illustrated anywhere. My email -
Tole painting patterns for all decorative painting skill levels.
Oct 05, 24 01:12 PM
 Looking for TOLE PAINTING PATTERNS? Here's a complete list. These packets are ready to download. You can be painting minutes from now.
Site Search
| site search by freefind | advanced |


You Can Paint These Trees and More
Get Your Video Course Now
Introductory Price
Save 30% plus
a Money Back Guarantee
New! Comments
Have your say about what you just read! Leave me a comment in the box below.