Mail Art Tutorial

I hope you enjoy this Mail Art demo. I've said it before, "If it sits still long enough it will get painted!" And so it goes with stationery.
I've been the recipient of arted up mail envelopes and I cherish each one. It's so personal and it feels like love! So nice...
Making art to put in the mail is such a great idea! It wasn't my idea, that's for sure. Actually, using mailing envelopes and postcards to make art that could be sent through the postal service was part of the "Fluxus Movement" which began in the late 1950's and 1960's.
For me, using envelopes for painting allows me to be creative while not spending a whole heap of money.
I use them for doodling and for trying out new mediums and techniques. I mess around with paints, colored pencils, inks, markers.... you name it.
I'm usually sending these envelopes to loved ones so I keep them in mind when I'm experimenting. If I'm mailing out to fellow artists I might get a little racy! Shhh...don't tell anyone.
So to get you started here's a project to whet your appetite.
What you'll need for your Mail Art project
Supplies
White envelopes, any size
Water basin
Disposable foam plate or wax palette
Paper Towel
Old Tea Towel, to cover your work surface
Tracing Paper
Grey Graphite Paper
Stylus
Sea Sponge (optional)
Hairdryer (optional)
Sharpie® Extra Fine Tip Permanent Marker (Black)
Line Drawing
Download it here
Americana Acrylics
Napa Red (DA165)
Payne's Grey (DA167)
Foliage Green (DA269)
Midnite Green (DA084)
Sea Glass (DA297)
Orange Twist (DA266)
Melon (DA251)
Teal Mint (DA332)
DecoArt Media
White Gesso
Brushes
#14 or #16 Flat
#1 mid-length Liner
1" Flat
#5 Round
Misc.
Clear acrylic sealer
Here we go...
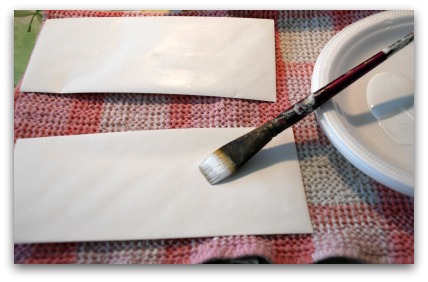 Prepare envelope with gesso.
Pour gesso on your foam plate. Use the large flat brush to apply the gesso to the front of your envelope. I usually prepare half a dozen or more at a time.
First moisten the brush in cold water and blot it well on paper towel. Pick up a bit of gesso, blend it on your foam plate and apply evenly and smoothly all over.
Allow to dry completely. I use the hairdryer to speed things up!
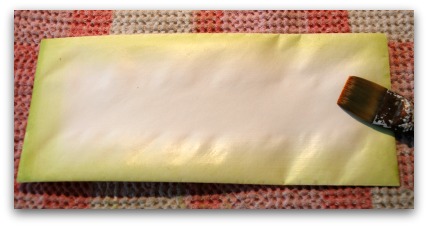 Shade perimeter of envelope with Foliage Green.
Lightly moisten the envelope with clean water and then apply a wide float of Foliage Green to the perimeter of the envelope. Keep the paint side to the edge of the envelope and the clean side of the brush facing inward.
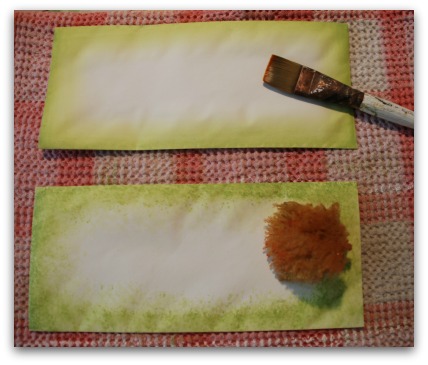 Instead of floating color, try sponging it on for a different effect.
Alternatively, you could just sponge on some Foliage Green using a slightly damp sea sponge on the pre-moistened envelope.
Once dry, repeat the last 2 steps. Moisten and float. Let dry thoroughly.
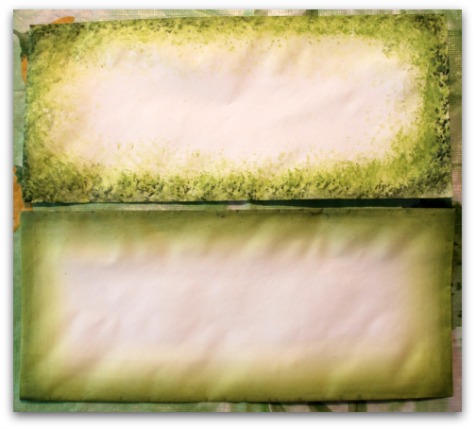 Repeat the floats or sponging with Midnight Green.
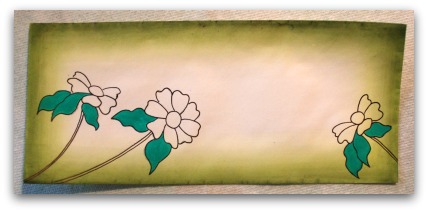
With Midnight Green, repeat the floats or sponging, this time make the shading a little narrower than the first applications. You want some of the lighter green showing through. Remember to let every step of the painting process dry completely.
Use a pencil to trace out the line drawing onto tracing paper. If you haven't done so already, download the free line drawing here.
Transfer the tracing and position it anyway you like on the envelope. Slip a sheet of grey graphite paper between the envelope and the tracing. Use a stylus to lightly transfer the design to the envelope. Transfer only the main outlines.
Notice I've added the smaller flower to the right hand corner facing the other way? With mail art projects you can add even more details to the envelope. Maybe free-hand a butterfly or dragonfly?
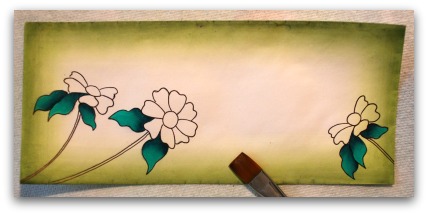
 Ink in the deign using the Sharpie®.
Use the Sharpie® to ink in the design.
 Basecoat the leaves with Teal Mint.
Use the #5 Round brush to basecoat the leaves with Teal Mint. Two coats letting the first coat dry.
Mail art is fun so far, isn't it?!
 Shade the leaves with Payne's Grey.
Use the #14 or #16 Flat to float shading at the base of each leaf and where a leaf overlaps another. Apply two soft floats for best effect.
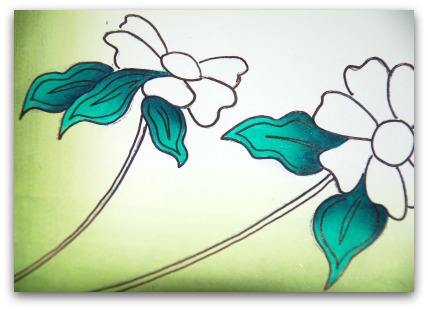 Use the Sharpie® to add the leaf details.
Use the Sharpie® to add the leaf details to all the leaves.
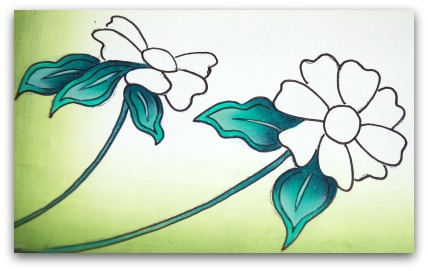 Float highlights with Sea Glass.
Float highlights inside the leaf details at the tips with Sea Glass. You will need to do the floats 3-4 times.
Use the Liner with Sea Glass, to add in the center veins.
At this point, also basecoat the stems using the liner brush and a mixture of Teal Mint and Payne's Grey.
Your mail art project is shaping up nicely!!
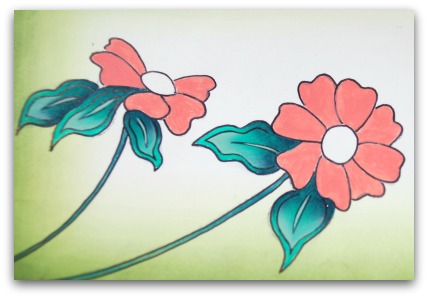 Basecoat the petals with Melon.
Use the #5 round brush to basecoat the petals. You will need to do two coats.
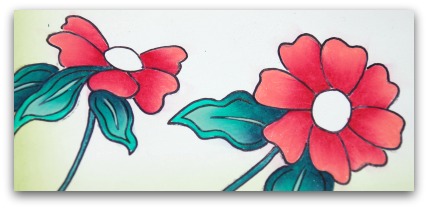 Shade the petals with Napa Red.
Use the #14 or #16 flat brush to float a shading at the base of the petals with Napa Red. Repeat.
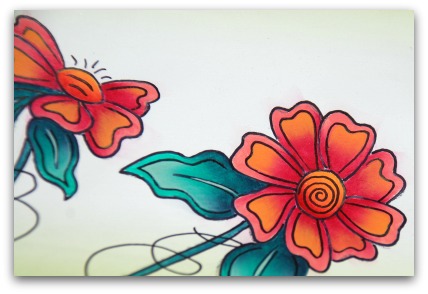
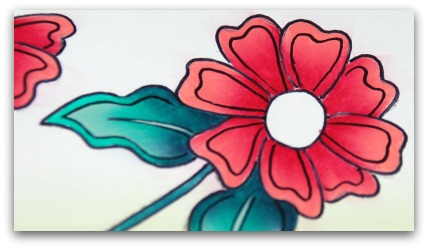 Use the Sharpie® to add the petal details.
Add the petal details to all of the flowers using the Sharpie®.
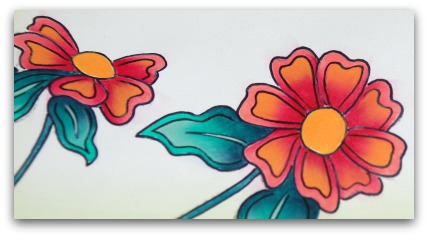 Basecoat the flower centers and highlight petals with Orange Twist.
Use the #14 or #16 flat brush to float highlights inside the petal details using Orange Twist. Repeat.
Use the round brush to basecoat the flower centers with Orange Twist. Two coats.
 Shade the flower centers with Napa Red. Add details to centers.
Shade the flower centers with floats of Napa Red, twice.
Add the flower center details with the Sharpie®. Also add the vine around the stems.
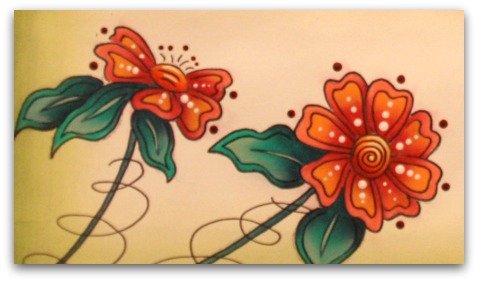 Add fun dots!
Use some of the gesso left on your foam plate to add highlights to the flower centers with the liner brush. Use the stylus to add dots to the petals with the white gesso.
Add Napa Red dots as shown.
Be careful around dots. They remain wet and fragile for a while. They could smear easily.
Y'know, this little design is not just for mail art. If you want to, you can use it to embellish anything at all!
Protect Your Mail Art
After your masterpiece is done and completely dry:
- Lightly spray or brush on a clear acrylic sealer to add moisture resistance and reduce smudging.
- Use 2–3 very light coats rather than one heavy coat to avoid warping.
Because mail can be exposed to moisture in transit, many artists use some form of protective finish when mailing painted surfaces. (If using postal systems, ensure the address remains clear and legible.)
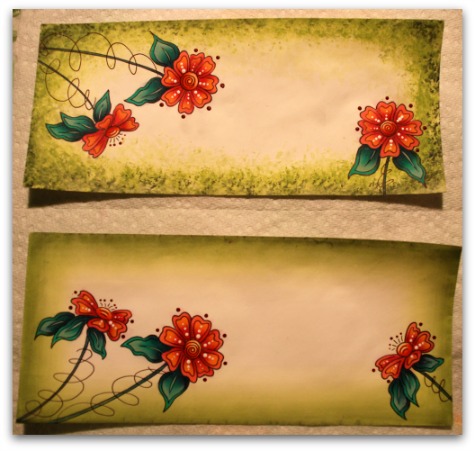
Here are two presentations featuring the same design. Feel free to flip the design any which way that suits your envelope. If you have a large envelope, enlarge the design!
Just leave room for the address and the stamp! Think of other things you could do to keep moving forward with this mail art concept!
OK, let's go from the Mail Art page back to the HOME page!
Introducing... Earmark Creative Studio

You Can Paint These Trees and More

Get Your Video Course Now
Introductory Price
Save 30% plus
a Money Back Guarantee


You Can Paint These Trees and More
Get Your Video Course Now
Introductory Price
Save 30% plus
a Money Back Guarantee
Recent Articles
-
Earmark decorative painting studio in Ottawa! A cozy place to paint.
May 02, 26 03:28 PM
 Earmark decorative painting studio is a very comfortable and relaxing studio and classroom catering to all painting levels.Located in rural, scenic Ottawa.
 -
CBP0012 Funky Winter Chicken
Apr 14, 26 03:18 PM
 You'll get your funky dance on with my Funky Winter Chicken e-Pattern Packet. Detailed step-by-step instructions, line drawings, pictures and materials ensure your success with this project.
 -
CBP0045 Stained Glass Coasters Pattern Packet
Apr 14, 26 03:16 PM
 This faux Stained Glass Coasters Pattern Packet will provide you with hours of fun creating and using these coasters.
 -
CBP0005-Daisies at Dusk
Apr 14, 26 03:06 PM
 We all love daisies and you will love painting Daisies at Dusk. This decorative painting e-packet also known as a tole painting e-pattern has detailed step-by-step instructions, lots of pictures, mate…
 -
CBP0004-Get-Crackin
Apr 14, 26 03:03 PM
 Here's Get-Crackin, an advanced, trompe loeil pattern packet. You will love the results you get. Detailed step-by-step instructions and lots of pictures.
 -
CBP0002-hey-tiger
Apr 14, 26 02:57 PM
 CBP0002-hey-tiger is a beautiful Eastern Tiger Swallowtail butterfly
 -
CBP0028-High Realism Poppy Pattern Packet
Apr 14, 26 02:49 PM
 Enjoy CBP0028-High Realism Poppy Packet. This project is guaranteed to please. Settle into a quiet place, add layers and watch this poppy come alive.


Site Search
| site search by freefind | advanced |


You Can Paint These Trees and More
Get Your Video Course Now
Introductory Price
Save 30% plus
a Money Back Guarantee