How to Paint a Candle
How to paint a candle is not difficult to learn and it's relaxing and fun to do. You could paint up a whole bunch of them to sell at a craft show. Or do a pair to give as a thoughtful gift.
Seems that Christmas time is when people are looking for inexpensive, do it yourself kinds of projects. Something that works up quickly and hopefully with little effort.
You could whip these up in one evening. Why not have some friends over and paint up some fun!
NOTE: Painted tapers are purely decorative and for display only.
Here's what you'll need to get started.
- White or cream colored candles
- Rubbing alcohol
- 1/4" Painter's Tape
- Cosmetic sponges
- Stylus or the handle of a small paint brush
- disposable foam meat tray or wax palette
Paint Brushes
- old flat paint brush
Color Palette by DecoArt Americana
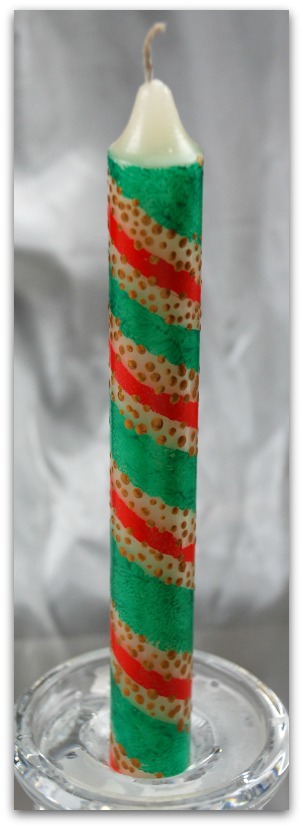
- Crystal Green - Dazzling Metallics
- Emperor's Gold - Dazzling Metallics
- Lipstick - Multi Surface Acrylics or regular Red acrylic
- DecoArt Multi Surface Sealer
Ideally you have a candle holder that you can use to hold your candle in place while each step dries.
Wipe down the candle with rubbing alcohol.
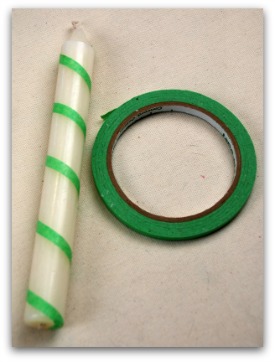
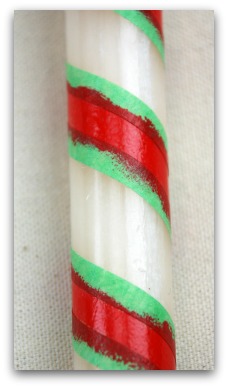
Apply the tape starting at the top of the candle and wind your way down doing your best to keep the tape evenly spaced.
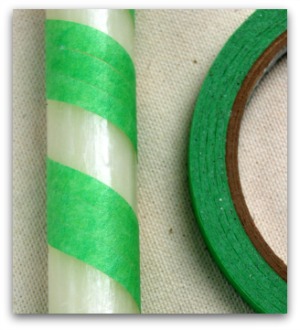
Apply the tape on both sides of the tape you just laid down. Make sure it butts up without overlapping.
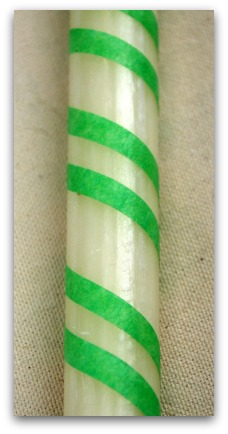
OK, now remove the tape in the middle. So far so good?
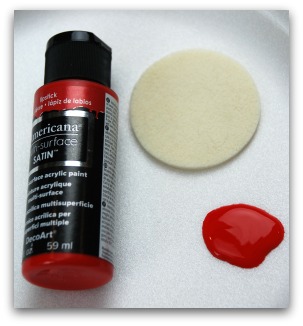
Pour a dollop of Lipstick onto your disposable foam tray and have a clean dry cosmetic sponge ready.
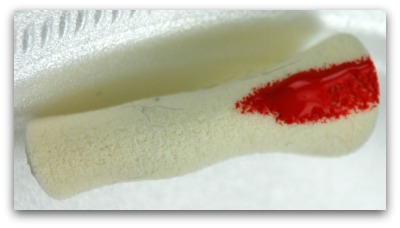
Fold the cosmetic sponge in half and load it into a little of the paint. Sponge it on the thin space between the two rows of tape.
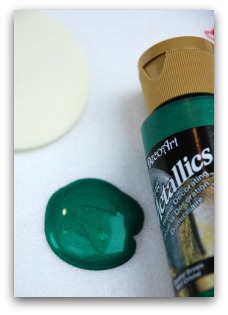
Pour out some Crystal Green and select a new cosmetic sponge.
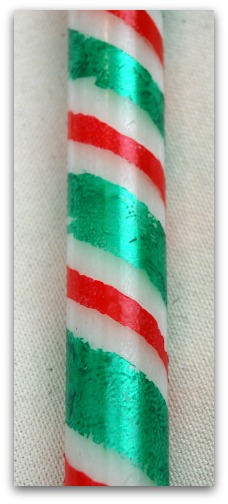
Apply the green in the wide space. Remove the remaining tape. Yes, some of the paint will lift but don't worry about it.
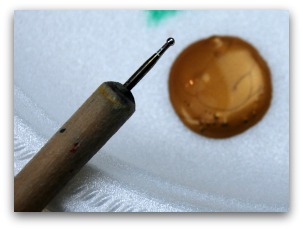
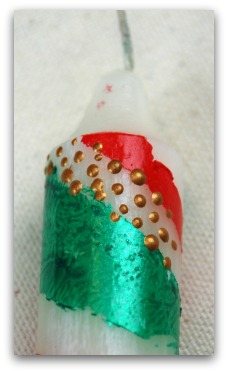
Using Emperor's Gold and the tip of a stylus, add dots between the green and red sections. The dots will remain wet and tender so be careful not to squish them. You may find it easier to put the candle in the holder to do this step.
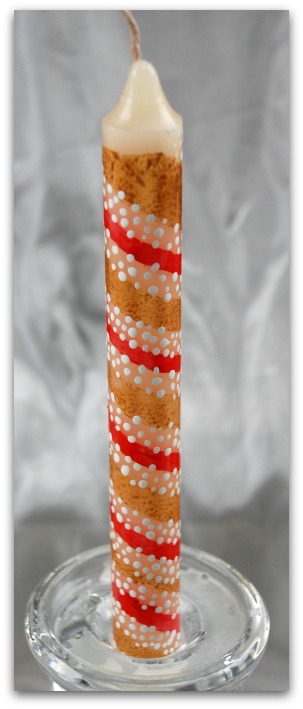
For this color version I used Emperor's Gold instead of Crystal Green and I made dots of White.
These worked up in no time at all. The next day, brush on DecoArt Multi Surface sealer
Here are two more candles
that work up very quickly!
How To Paint a Candle Continues...
How to paint a candle couldn't be any easier!
Here's what you'll need for this project
- White or cream colored candles
- Rubbing alcohol
- Cosmetic sponges or Petit Four
- Stylus or the handle of a small paint brush
- disposable foam meat tray or wax palette
Paint Brushes
- old flat paint brush
- #6 Flat
- 10/0 Liner
Color Palette by DecoArt Americana
- Emperor's Gold - Dazzling Metallics
- Black Pearl- Dazzling Metallics
- Lipstick - Multi Surface Acrylics or regular Red acrylic
- Chartreuse - Multi Surface Acrylics or other bright green acrylic
- Green Beret - Multi Surface Acrylics of other dark green acrylic
- White Acrylic
- DecoArt Multi Surface Sealer
Wipe down one of the candles with rubbing alcohol.
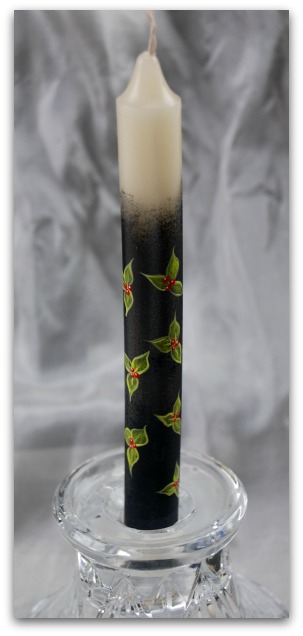
I'm only going to demo the Black Pearl candle because I only had one candle left!
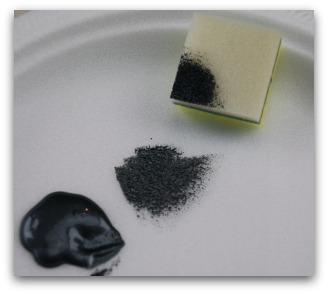
Pick up a little Black Pearl on a small section of a clean dry sponge. Dab it on the foam plate so there's not too much paint on the sponge.
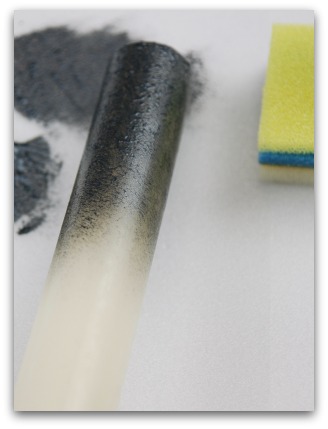
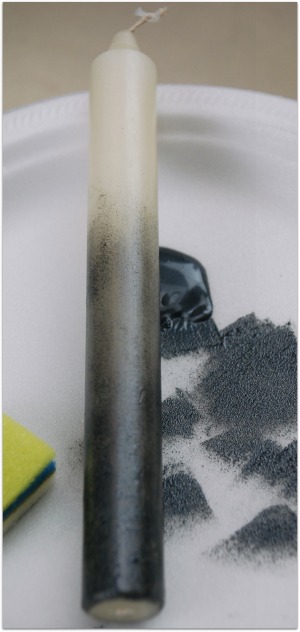
Starting at the base of the candle, dab on the paint all around working your way up.
When you get halfway up the candle, reduce the amount of pressure on the sponge to allow the paint to gently fade off. This creates an ombre effect.
It's fun to learn how to paint a candle, isn't it?
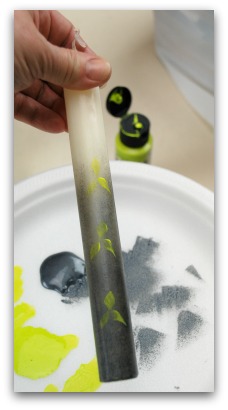
From this point forward hold the candle by the unpainted end.
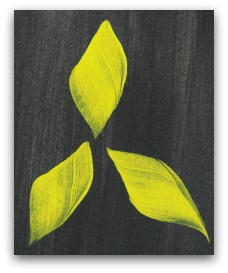
Using the #6 Flat and Chartreuse, make clusters of 3 S-Strokes (leaf strokes) randomly on the candle. Make as many as you like, being careful not to get your fingers on the wet leaves.
If you prefer brighter leaves, go over the leaves again with another coat after the first has completely dried.
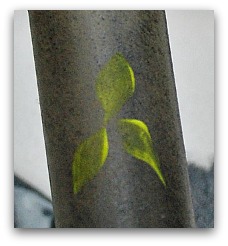
Using the Liner, loosely outline each leaf with a mix of White and Chartreuse. Add a center vein to each leaf.
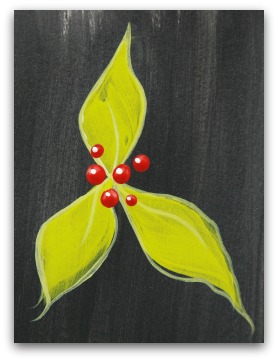
Use the stylus to add 3 or more berries where the leaves meet in the center.
When dry, use the Liner to add White shine dots to each berry.
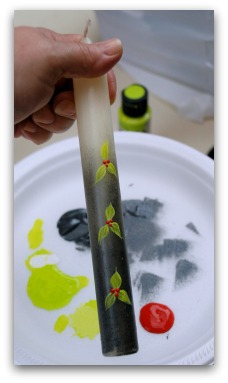
Here's the step-by-step on a larger scale.
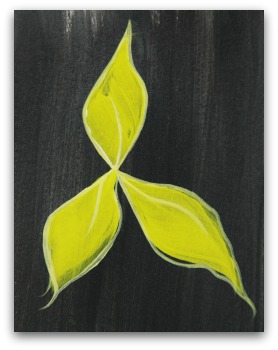
If you're new to tole and decorative painting, here's a great tutorial for making S-strokes.
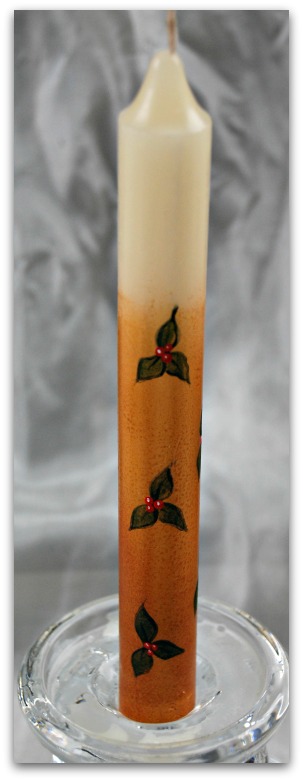
To create the gold candle use Empreror's Gold for sponging on the ombre effect.
Use Green Beret for the leaves. Outline them in Green Beret with some Black Pearl mixed in to make the green darker.
Do the berries in the same way.
Use the sealer to protect your work once everything has dried thoroughly.
And those are just some ways to learn how to paint a candle!
Let's go from this how to paint a candle page back to the HOME page.
You Can Paint These Trees and More

Get Your Video Course Now
Introductory Price
Save 55% plus
a Money Back Guarantee


You Can Paint These Trees and More
Get Your Video Course Now
Introductory Price
Save 55% plus
a Money Back Guarantee
Recent Articles
-
Can you paint more after setting in oven?
Feb 16, 24 06:36 AM
 Hi there I had taken a class and painted a wine glass, then set the paint in the oven. Can I add more paint or designs and re-sent again in the oven?
 -
gallery glass
Dec 11, 23 07:44 AM
Can Gallery Glass be restored if it has thickened? -
gallery glass
Sep 19, 23 07:44 AM
Can Gallery Glass be restored if it has thickened? -
Looking to commission an artist to paint a milk churn for me!
Sep 19, 23 07:43 AM
Greetings I am looking to commission a recognized artist in this field do you or someone you could recommend my name is Lesley Kelly Cell 403 512 8911 -
GLAZE FINISH - what is available now?
Sep 19, 23 07:42 AM
As you said, Delta PermEnamels are discontinued. I would finish off fixing my ceramic vintage pieces with their glaze (either clear gloss or satin). -
Glass Paint Temperature Considerations?
May 15, 22 11:10 AM
I’m wondering how durable glass paint/faux leading is giving shifting temperatures? Or, if some glass paint brands are better for this than others? For -
How to make a collage in a few easy steps.
Feb 11, 22 01:35 PM
 Master how to make a collage with my simple step-by-step tutorial. Lots of pictures and free downloads too!
Site Search
| site search by freefind | advanced |


You Can Paint These Trees and More
Get Your Video Course Now
Introductory Price
Save 55% plus
a Money Back Guarantee
New! Comments
Have your say about what you just read! Leave me a comment in the box below.