Chalk Paint Furniture
Chalk paint furniture painting is not very difficult to do at all. Here I've taken one of my studio chairs and turned it from blah to funky fun.
My motivation to start painting the chairs in the studio was my cats.
It’s a big challenge for me to keep the chairs free of hair.
Let’s face it, I don’t want my students going home with furry derrieres! That just wouldn’t be right.
So, what do I do? I have to run around with lint rollers "de-furring" all of my chairs every time there's a workshop. It's a real pain in the… oh, I won’t go there. But you get the idea.
The worst part is this. The fabric actually seems to knit the hairs right in, making it really hard to clean. So I had an idea.
What would happen if I painted the chairs? Yes, you heard me... paint them. Would the paint seal the warp and weft of the fabric so the hairs couldn't get trapped as easily?
I didn't know what to expect. If I painted the chairs, what would happen to the fabric? Would it make the fabric stiff and uncomfortable to sit on?
But, you know me by now so, yep, you guessed it. It’s time to sacrifice… ahem, I mean upgrade a chair and see what happens.
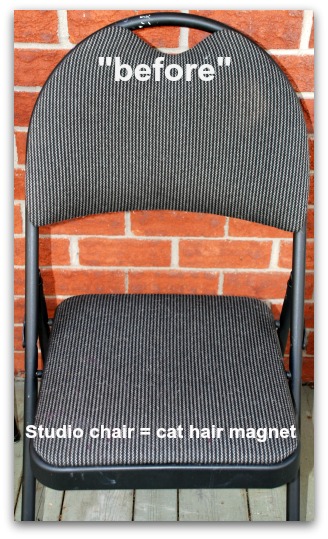
Here is one of the chairs "before" painting. I "de-furred" it as best as I could.
I was not concerned about the color I started with. That’s because of what I plan to do in the end. So stay tuned.
I used Americana Decor Chalky Finish paint, color "Smitten". It’s not a color I particularly like. But that’s okay. I needed to use up a part jar.
I knew I wanted the paint to seep
into the fibers of the fabric. So, I mixed the paint with water using a
ratio of 1 to 1. That’s a mixture of half water and half paint.
I allowed the first coat to dry for about 24 hours. Then I sanded down the fabric surfaces to smooth down the nap.
The next step was to wipe off the sanding dust and apply another coat of paint in the same way.
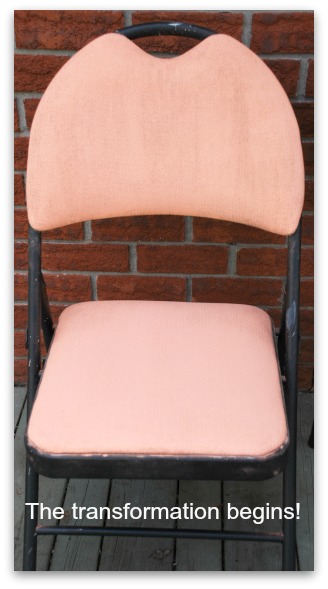
Here is the chair after 2 coats and after sanding both coats. This is so cool!!!
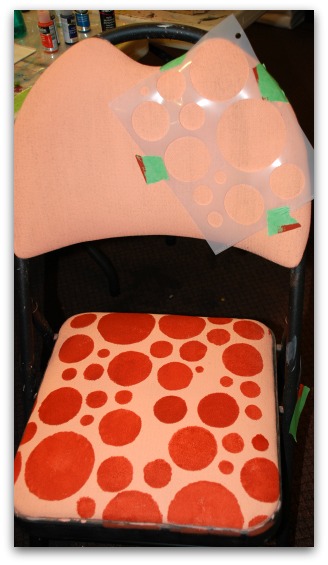
Here I've begun to stencil a bunch of circles. I used green painter's tape to keep the stencil from moving around. The color is Americana Decor Chalky Finish paint, color "Cameo". The stencil is by Laurie Speltz's Creative Coach Background Basecoat Stencil #BCS238 "Circles".
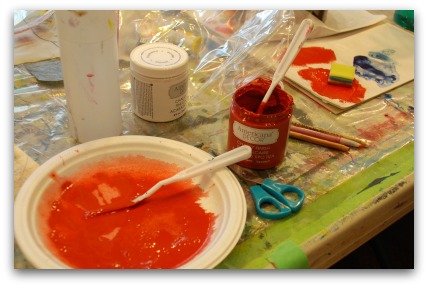
I watered down the chalk paint about 1 to 1 ration and I used a small sponge to apply the color.
Before re-positioning the stencil, I cleaned it every time and wiped it dry.
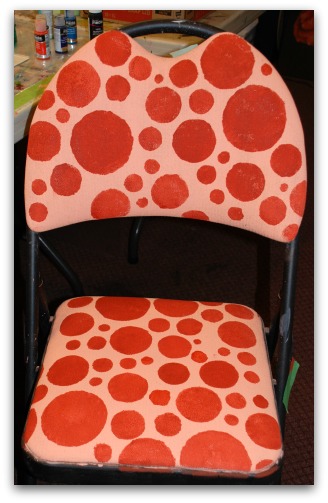
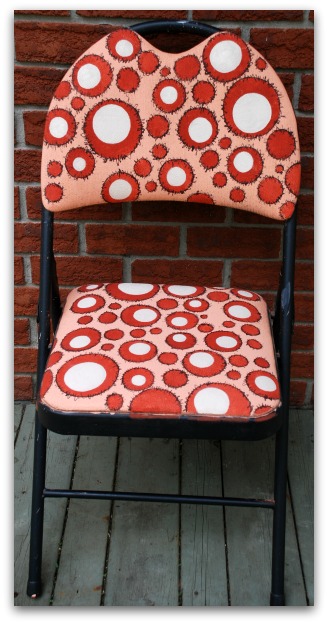
I am making progress! The circles don't have perfect edges and the paint is not perfectly opaque. But I don't care. There's more to come.

It was easier to sit on the floor to start doing details. I'm using a long script liner loaded in "Soft Black" by DecoArt Americana acrylic paint.
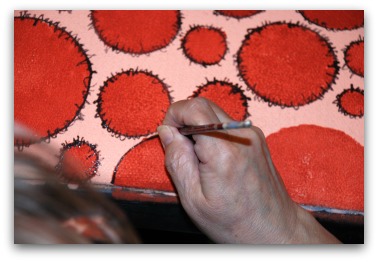
Keeping the acrylic paint to an inky consistency, I outlined the circles and then I added some loose, jagged lines around the circles.
Here are all of the circles outlined in detail
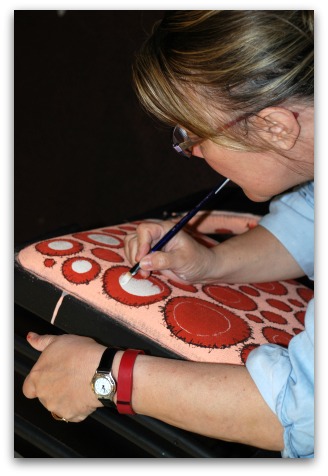
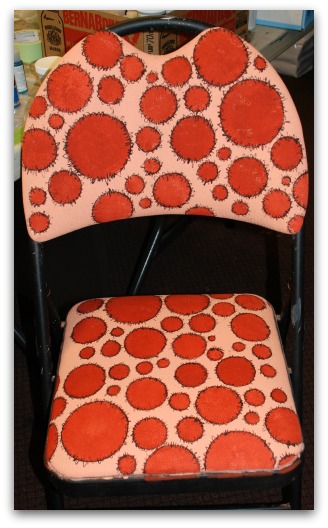
Using the stencil again, this time I used a white chalk pencil to trace out circles within the larger circles. I used a #10 Filbert brush to basecoat those circles with "Natural Buff" by DecoArt Americana. Two coats did a beautiful job.
I may add yet some other details but so far I'm pleased with the progress!
For your shopping convenience....
These are links to Amazon. When you buy products from my site I do earn a teensy weensy commission which does not affect you at all. The commissions allow me to keep this web site alive. Please do not feel obligated to purchase anything. Always support your local businesses.
You Can Paint These Trees and More

Get Your Video Course Now
Introductory Price
Save 55% plus
a Money Back Guarantee


You Can Paint These Trees and More
Get Your Video Course Now
Introductory Price
Save 55% plus
a Money Back Guarantee
Recent Articles
-
Can you paint more after setting in oven?
Feb 16, 24 06:36 AM
 Hi there I had taken a class and painted a wine glass, then set the paint in the oven. Can I add more paint or designs and re-sent again in the oven?
 -
gallery glass
Dec 11, 23 07:44 AM
Can Gallery Glass be restored if it has thickened? -
gallery glass
Sep 19, 23 07:44 AM
Can Gallery Glass be restored if it has thickened? -
Looking to commission an artist to paint a milk churn for me!
Sep 19, 23 07:43 AM
Greetings I am looking to commission a recognized artist in this field do you or someone you could recommend my name is Lesley Kelly Cell 403 512 8911 -
GLAZE FINISH - what is available now?
Sep 19, 23 07:42 AM
As you said, Delta PermEnamels are discontinued. I would finish off fixing my ceramic vintage pieces with their glaze (either clear gloss or satin). -
Glass Paint Temperature Considerations?
May 15, 22 11:10 AM
I’m wondering how durable glass paint/faux leading is giving shifting temperatures? Or, if some glass paint brands are better for this than others? For -
How to make a collage in a few easy steps.
Feb 11, 22 01:35 PM
 Master how to make a collage with my simple step-by-step tutorial. Lots of pictures and free downloads too!
Site Search
| site search by freefind | advanced |


You Can Paint These Trees and More
Get Your Video Course Now
Introductory Price
Save 55% plus
a Money Back Guarantee
New! Comments
Have your say about what you just read! Leave me a comment in the box below.